Create Pipelines to Perform Incremental Load from Warehouse to Lakehouse

In the last few blogs in the Data Factory series using Fabric, we learnt how to interact with data pipelines and Data flows in Data Factory. In this blog, let us continue to explore a little more deeper. We will see a new concept on how to do the incremental load in data pipelines, load data into Lakehouse and see how to interact with SQL to store information.
In this use case, we will use both Lakehouse and Warehouse for the data extraction and insertion with SQL to load the data.
Creating a Pipeline in Data Factory
In the fabric window, select the Data Factory icon from list of options for different workloads as shown below.
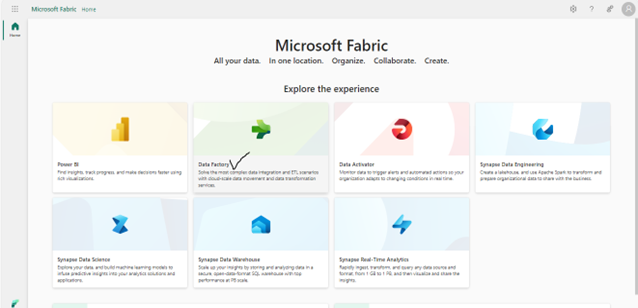
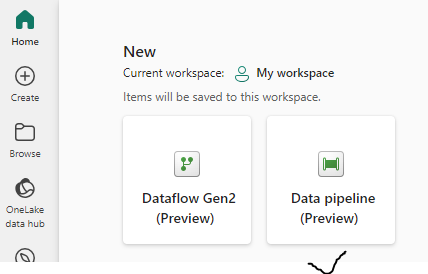
You will see options to create data flows and data pipelines. Click on Data pipeline to create a new Pipeline.
Creating tables
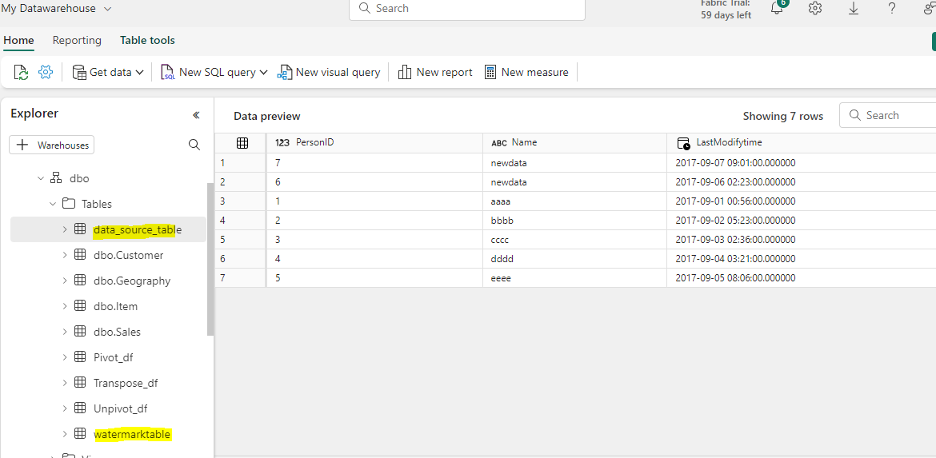
For this use case, we will go to the warehouse and create tables which will be used later. Below are details of the 2 tables that needs to be created.
| Table Name | Description | Columns |
|---|---|---|
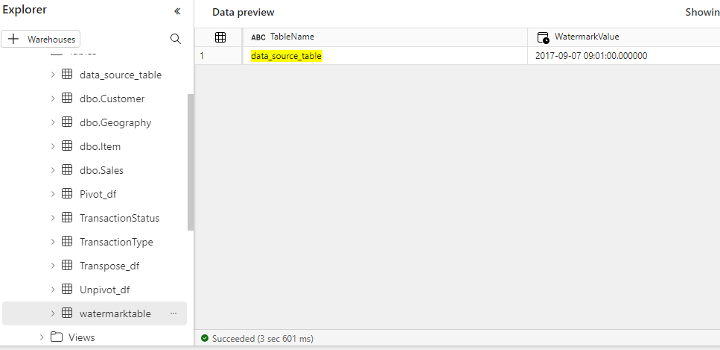
| watermark | Contains only the last run information | PersonID, Name, LastModifyTime |
| data_source_table | Contains the actual data | TableName, WatermarkValue |
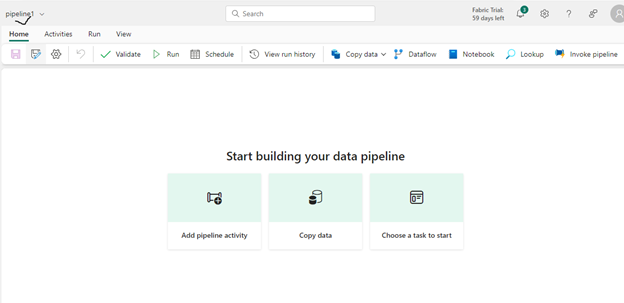
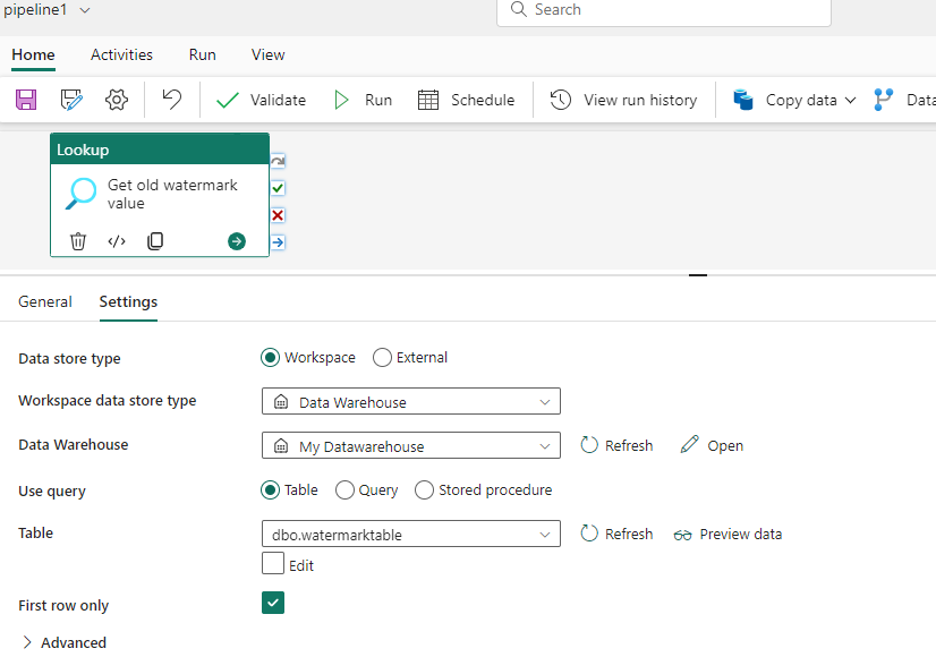
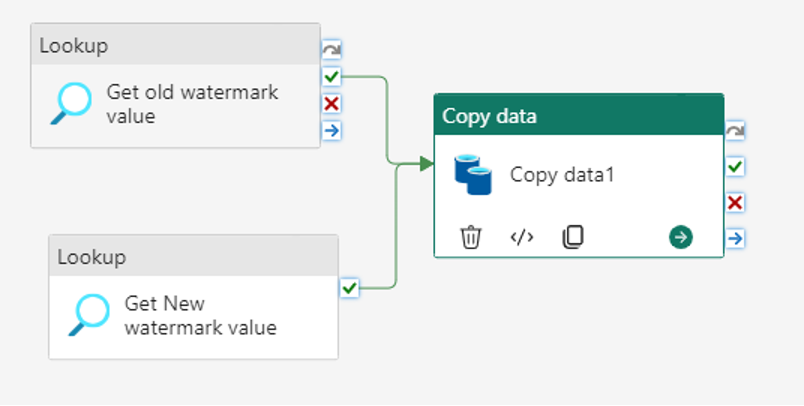
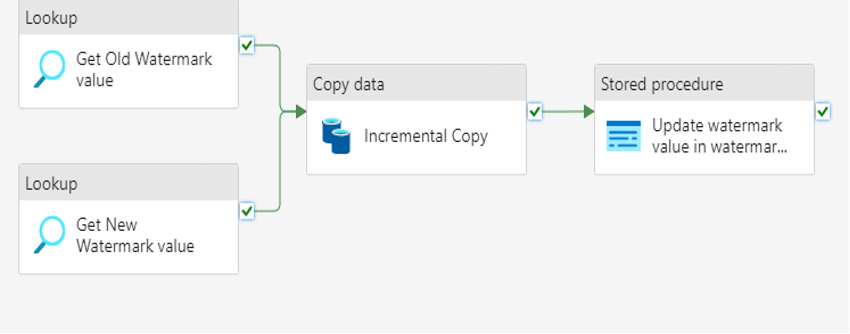
Next, go to pipeline canvas in data factory pipeline. Drag the Lookup activity in Home tab; it will be added to the canvas. Rename it to “Get Old Watermark Value”. Go to Settings and set the following configuration –
- Choose the data store type as Workspace
- Choose the workspace data store type as Warehouse
- In Warehouse, choose the warehouse name from the dropdown list
- After selecting the data warehouse, use the query as Table. Select the table name from the list and make sure to check the First Row Only check box.
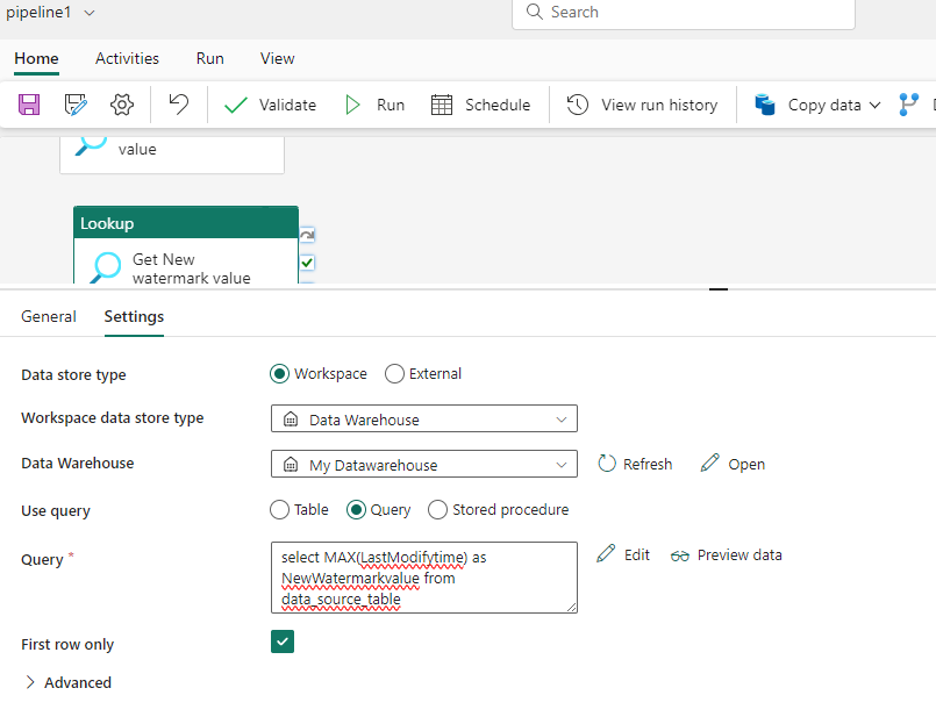
Drag one more Look up activity again and it will be added to canvas. Rename it to “Get New Watermark value”. Go to Settings and set the following configuration –
- Choose the data store type as Workspace
- Choose the workspace data store type as Warehouse
- In Warehouse, choose the warehouse name from the dropdown list
- After selecting the data warehouse, use the query as Query. Write a query to get the last run information from the SQL table (as shown in the image below).
- Make sure to check the First row only check box (like before) to get the single output from activity
Next, add the Copy activity. Rename it to “Incremental Copy”. Map both the lookup activities to this copy activity by dragging the On-success from lookup activities to copy activity as source.
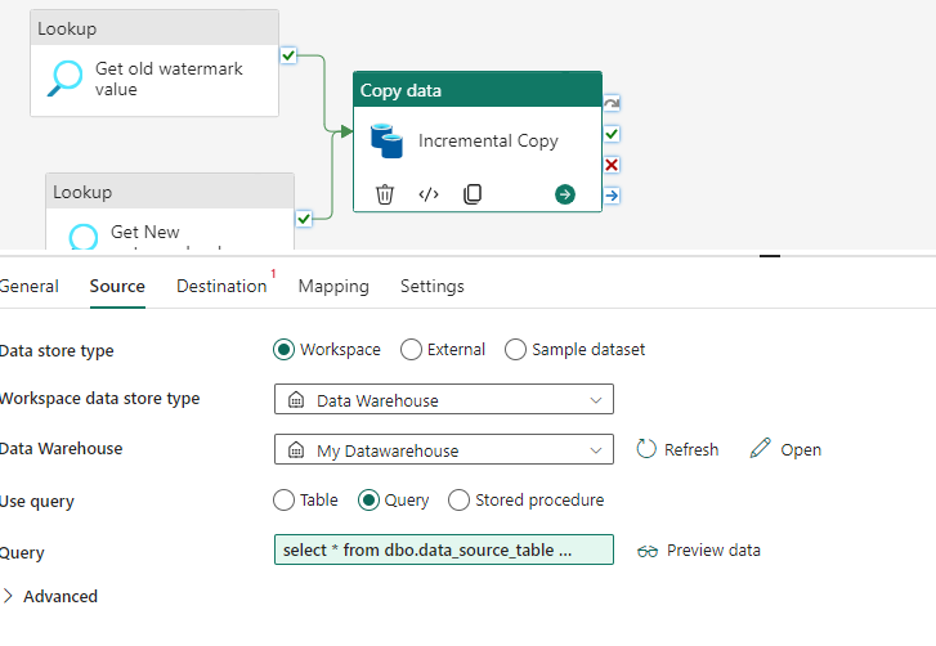
Setting up Source Attributes
Go to Source tab and set the following configuration
- Choose the data store type as Workspace
- Choose the workspace data store type as Warehouse
- In Warehouse, choose the warehouse name from the dropdown list
- In the table input, use Query as the option. In the query pane, write a SQL query to read the data to get the watermark values by using both lookup activities values in filter condition.
select * from {tablename} where LastModifytime > ‘@{activity(‘Get Old Watermark value’).output.firstRow.WatermarkValue}’ and LastModifytime <= ‘@{activity(‘Get New Watermark value’).output.firstRow.NewWatermarkvalue}’
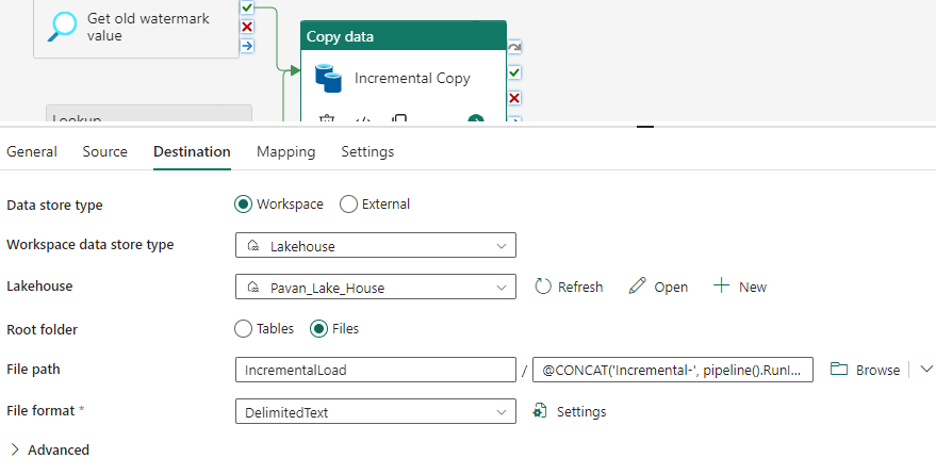
Setting up Destination Attributes
Now that we have set the source attributes, let us set up the same for destination.
Go to Destination tab and set the following configuration
- Choose the data store type as Workspace
- Choose the workspace data store type as Lakehouse
- In Lakehouse, choose the Lakehouse name from the dropdown list
- In the root folder, choose the files option since our source is SQL warehouse. Enter the path to save the file.
- Choose the File Format as Delimited Text
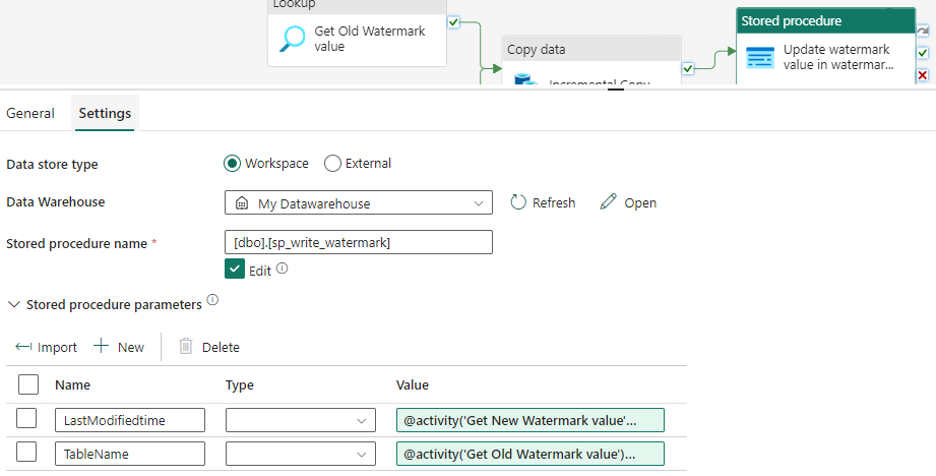
Once copy activity setup is complete, we need to update the new watermark value to the watermark table every time. So, the next time when we run the pipeline, the watermark table will be updated with the new value. And the same will be used in copy activity input via lookup to fetch the data from source. To do this, we should make use of the Stored Procedure activity. Go to Settings,
- Choose the data store type as Workspace
- Select the Warehouse name
- In the Stored Procedure Name text area, click on the Edit checkbox and provide the stored procedure name.
Before implementing this activity, create a stored procedure in warehouse and use it here. You can try the below sample to update the value.
CREATE PROCEDURE [dbo].[sp_write_watermark] @LastModifiedtime datetime, @TableName varchar(50)
AS
BEGIN
UPDATE watermarktable
SET [WatermarkValue] = @LastModifiedtime
WHERE [TableName] = @TableName
END
GO
After adding the stored procedure activity to the pipeline canvas, set the procedure name and add the parameters as expected as we will send the values to stored procedure using parameters only.
Once this stored procedure setup is completed, close the empty pipeline canvas.
Running the Pipeline
As a final step, go to the Home tab to Save the changes. Click on “Run” next to it to validate the changes. Once you see there are no errors, click on Run pipeline to start.
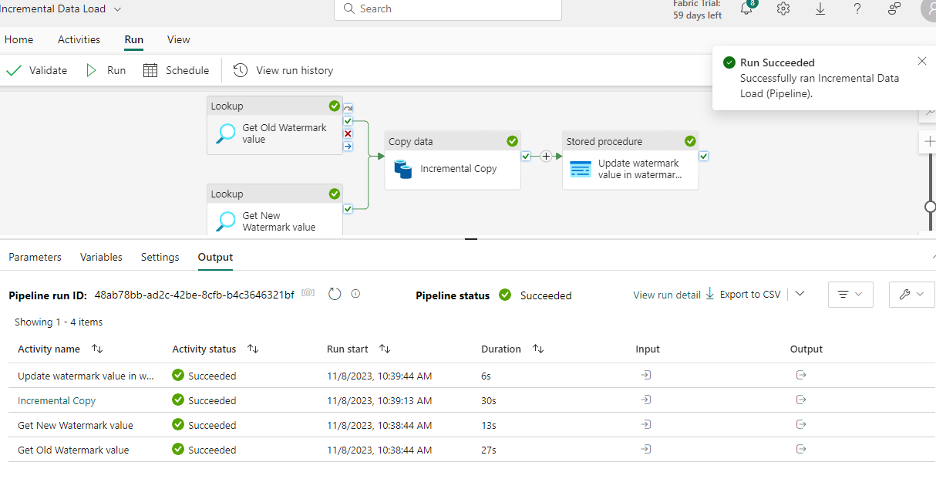
Once the pipeline succeeds, check the input and output of each activity to see the old and new watermark values and you will see the difference. On successful completion of the pipeline run, the pipeline status will show success along with other pipeline details as shown below.
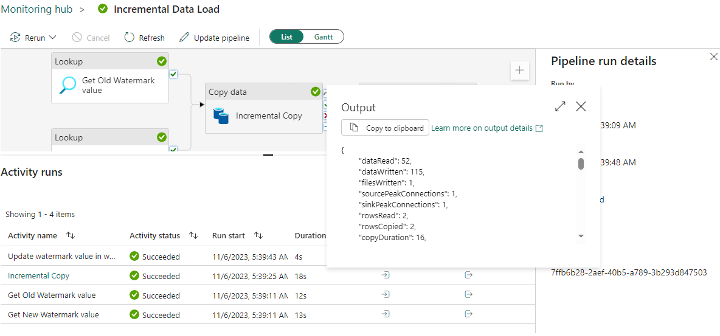
Additionally, you can see each activity output for the data load. Now, let’s see the copy activity output. Click on the Output icon. This shows the details of rows being copied.
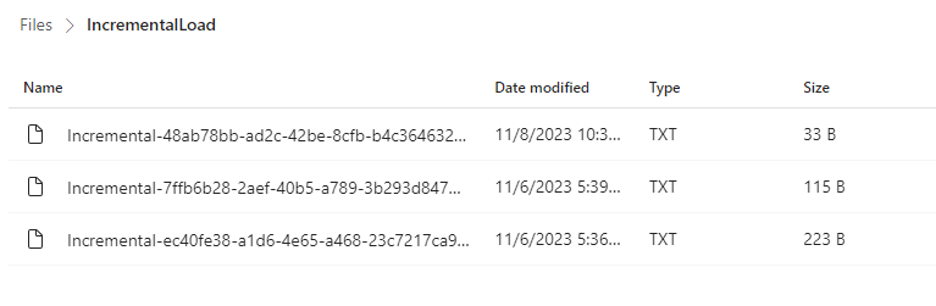
Go to Lakehouse and see the files in the target folder. The files will copy in the Incremental Load folder.
Wrapping Up
We have taken a look at how we can do the incremental load in data pipelines, load data into Lakehouse and how to interact with SQL to store information. You can add more dates in the source warehouse tables to see more differences from data perspective. In case you missed out, make sure to check out our previous blogs in this Data Factory using Microsoft Fabric series by clicking the below links.
Data Factory in Microsoft Fabric: A Powerful Data Integration Solution
Create Dataflow in Data Factory to Copy Data from Excel Web Source to Warehouse
Create Dataflow to Load Data from Excel Web Source to Lakehouse