Create Dataflow in Data Factory to Copy Data from Excel Web Source to Warehouse

In our last Data Factory series using Fabric, we saw how to create a basic pipeline which copies the data from Microsoft Azure Blob Storage to Lakehouse with auto mail alert. In this article, let’s explore our knowledge on creating a Dataflow in Data Factory to load the data from Web API connector to warehouse.
For this use case, we will use Warehouse in Microsoft Fabric. It is a fully managed, serverless, transactional data warehouse that natively supports an open data format (Delta Parquet) to store data in the form of tables. It is designed to simplify data management and analysis to provide seamless integration with Power BI and other fabric workloads.
Setting up Dataflow in Data Factory
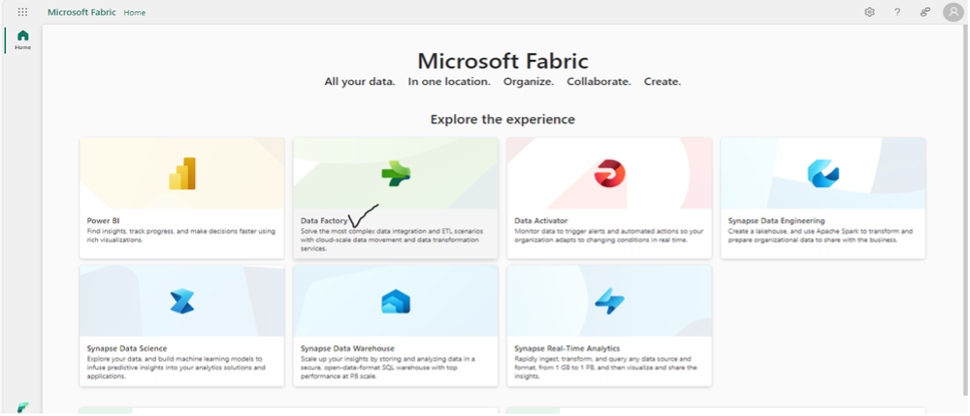
In the Fabric window, select the Data Factory icon from list of options for different workloads.
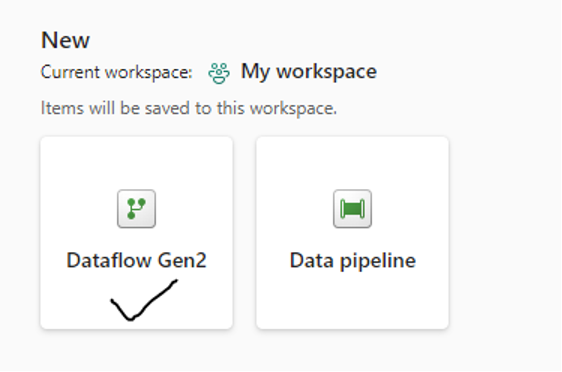
You will see options to create data flows and data pipelines. Click on Dataflow Gen2 to create a new dataflow.
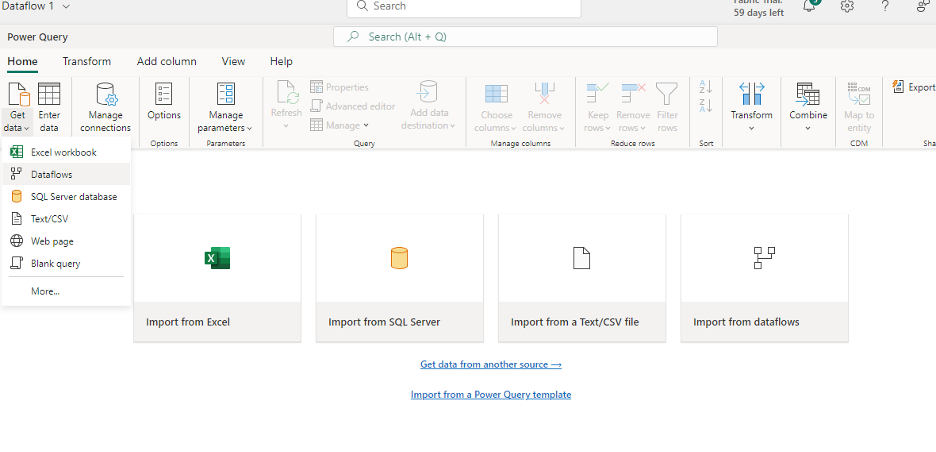
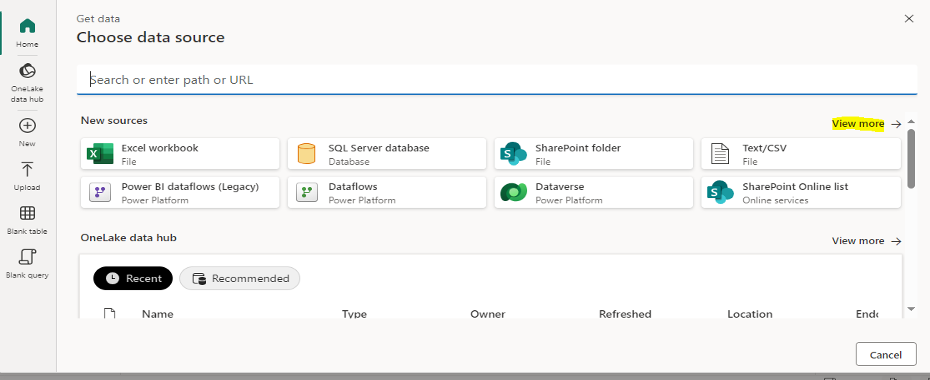
You will see the dataflow editor where you can see the list of options to connect to any data source. Choose the appropriate one based on your requirement.

Dataflow in Data Factory – Web API Connector Settings
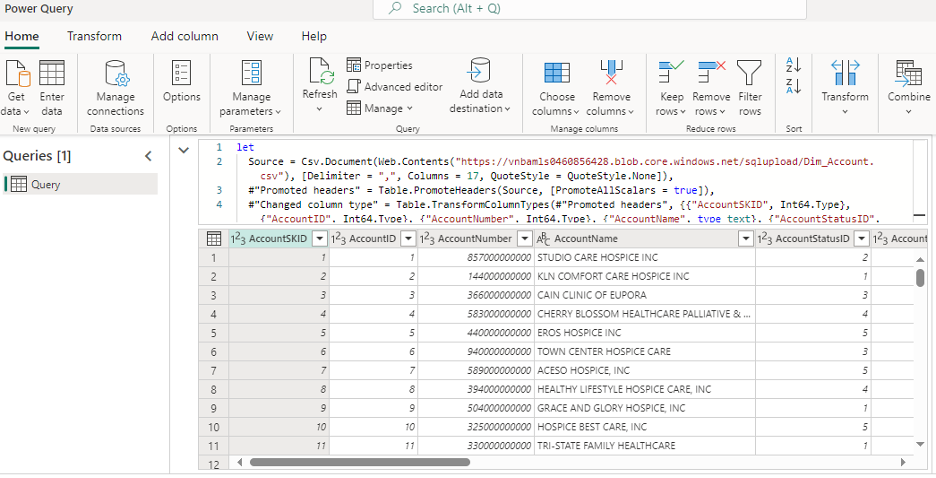
For this use case, we will use the Web API connector to get the CSV files. To connect to the data source, click on Get data option under the Home tab and click on More. It will open the new sources connector window with various options. Click on View More.
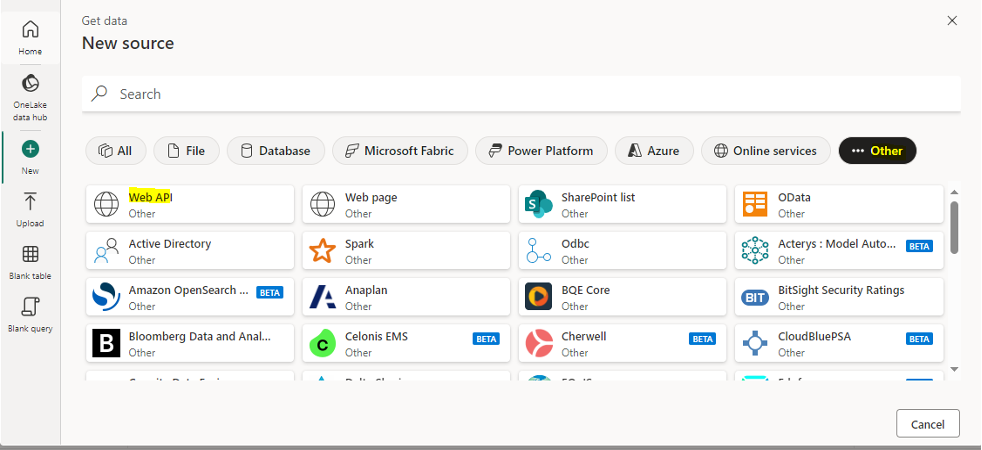
Select the Other option from the top right corner of the headers section. Choose the Web API connector from the list.
Once you select the Web API, enter the following information in the connection window – URL, Connection Name and Authentication kind.
Pro Tip: In the URL section, you can provide the source file location. It can be either the Blob file from Azure Blob storage (if it has public access) or your GitHub repository (with file access set as public).
In our case, let’s use GitHub as an example. For Authentication, you can leave it anonymous, for now, if your file is public.
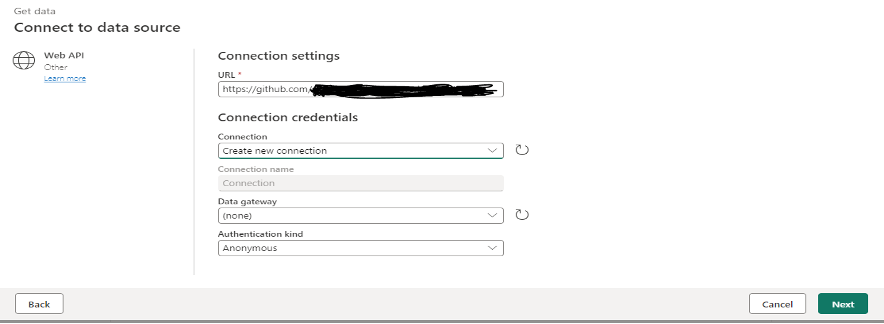
Click on the Next button to see its preview after filling in the required information.
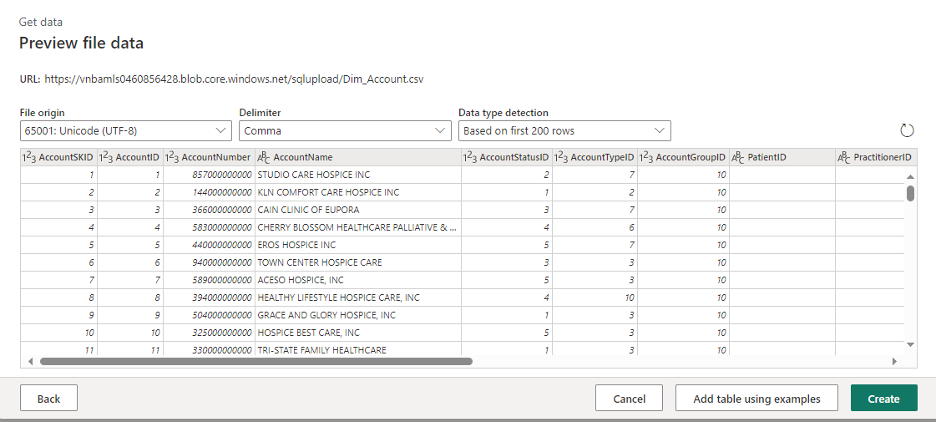
Click on the Create button to establish a connection with the source. It will show the data in the dataflow pane in the form of an excel data. Here, we can do any kind of transformation related to data.
Set up Data Destination
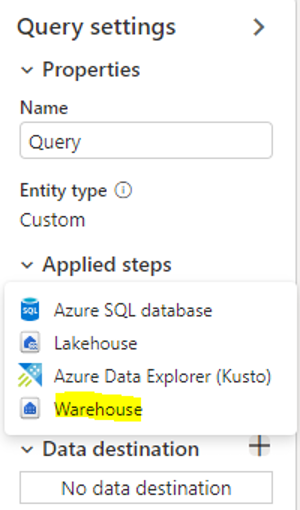
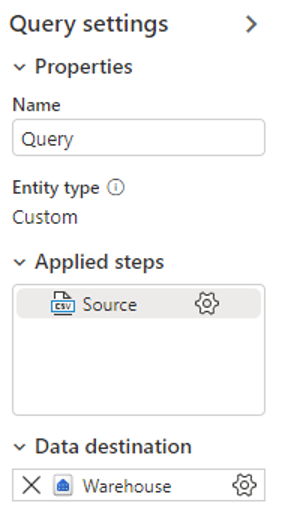
Let’s create a destination in your dataflow to load the data at the target end point. To add the destination, click the + sign next to Data Destination at the bottom right of the screen. Select Warehouse from the dropdown.
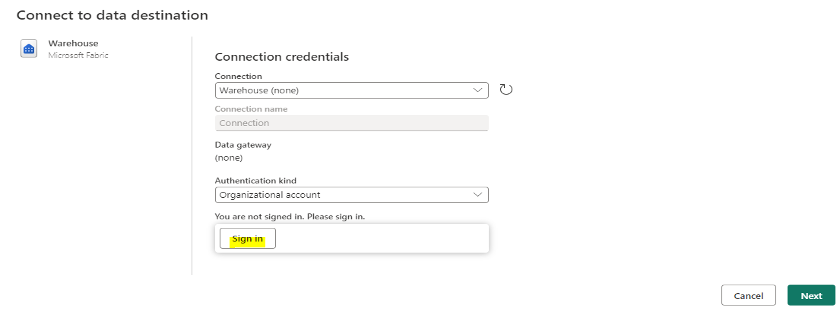
If you have the warehouse already created in your workspace, select it in the Connection input. If not, provide the connection name. Enter the login credentials to create a warehouse. Click on the Next button.
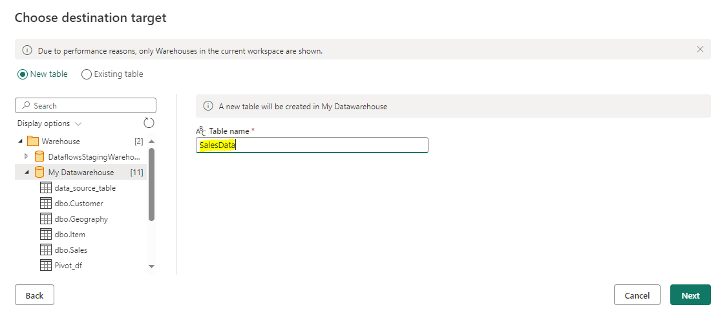
In the next step, you will be able to choose the destination target. Select the new table or existing table, if already available in warehouse. In our case, let’s select the new table. Enter the table name to load the data into the new table. Click on Next button.
Next, check the predefined mapping for source and target which is auto populated by Dataflow. You can change the datatypes, if required. For now, let’s retain them as is.
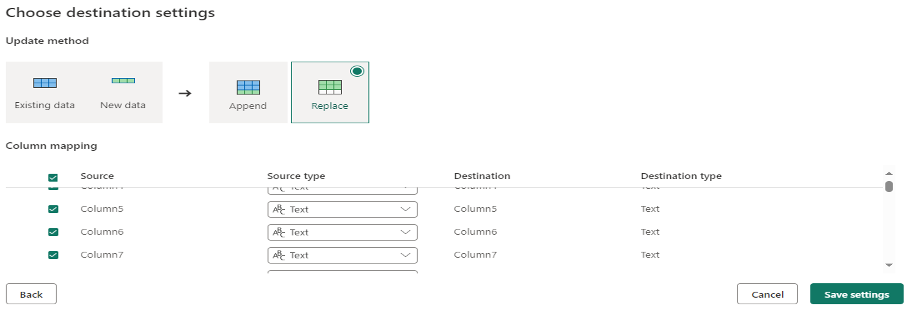
Select Append or Replace option at the top. Append will add the new data every time to the target table from the source. Replace will always delete and insert the whole table with new data every time. Let’s choose Replace as update method and click Save Settings. On the Dataflow editor, you will see the Warehouse added as a destination to the bottom right of the query settings pane in Data Destination section. Hover on it for confirmation.
Dataflow Editor – Publishing the changes and Data Refresh
Publish the changes. You will exit the dataflow editor back to the workspace. It will be saved and refreshed at the same time. In its first auto refresh, data will be loaded into the target table. Next time, you need to either manually refresh the dataflow every time when you need latest data in target table or schedule it by going to Refresh History section; and click on Schedule Refresh.
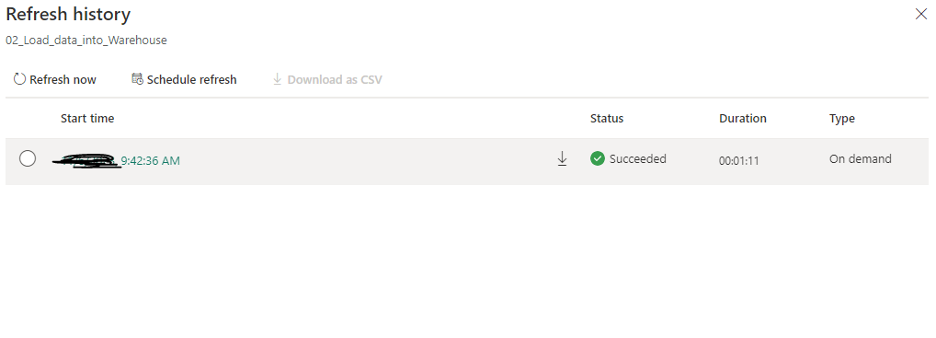
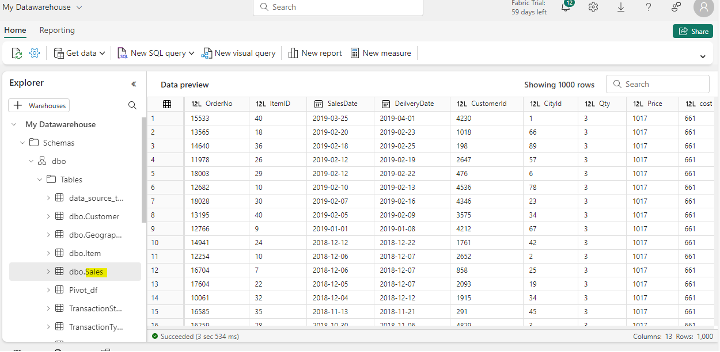
Once the data refresh is complete, it will show the status as Succeeded. To check the data, go to your warehouse from the workspace and see whether the data is loaded properly into the table or not.
Wrapping Up
We have taken a look at how to create a Dataflow in Data Factory to copy the data from Web API connector to Warehouse. In case you missed out, make sure to check out our previous blogs in this Data Factory Series using Microsoft Fabric series by clicking the below links. Our next blog in this series will explain how you can import data from SharePoint to Lakehouse using simple transformations with Dataflow.
Data Factory in Microsoft Fabric: A Powerful Data Integration Solution