Create Pipeline in Data Factory to Copy Data from Azure Blob Storage to Lakehouse with Auto Mail Implementation

In the last article in our Data Factory Series using Fabric, we had introduced the concept of Data Factory Fabric. In this article, let’s explore our knowledge on data pipelines by creating a basic pipeline which copies the data from Microsoft Azure Blob Storage to Lakehouse.
For this use case, we will use Lakehouse which combines the best of data lake and data warehouse. It allows you to store, manage, and analyze structured and unstructured data. It also provides a SQL endpoint and a default dataset for querying the data in the Lakehouse using T-SQL.
Creating a Pipeline in Data Factory
In the fabric window, select the Data Factory icon from list of options for different workloads as shown below.
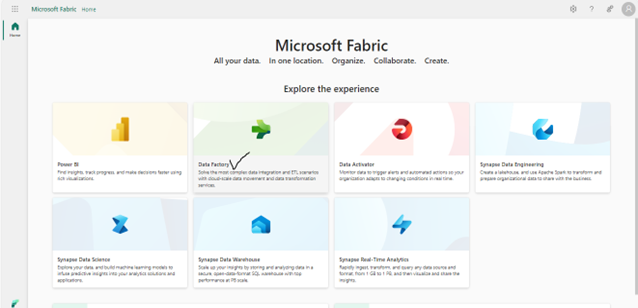
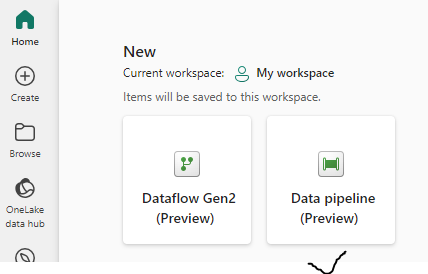
You will see options to create data flows and data pipelines. Click on Data pipeline to create a new Pipeline.
You will be taken to a pipeline editor where you can see all the activities. Choose any of them based on your requirement. You can also change the name of the pipeline on top-left of this window by clicking the dropdown as shown below.
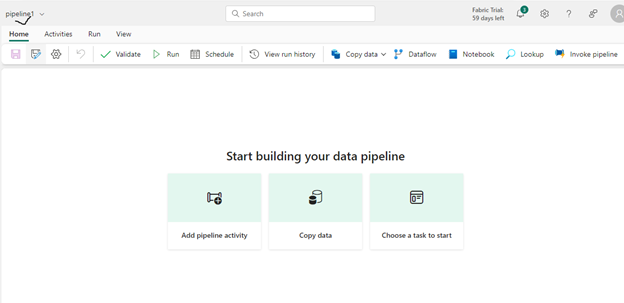
For this use case, we will use the Copy Data activity to copy data from Azure Blob storage. Click on Copy Data activity in the Home tab and select Add to canvas option.

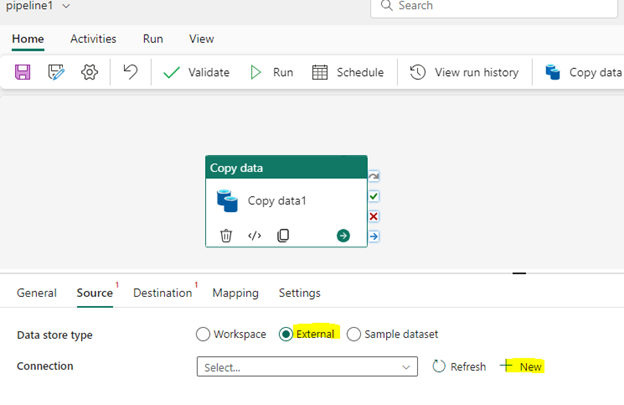
Select the activity and rename it as you want. In the bottom section, choose the Source tab and you can see data store types. Since we are connecting to Azure Blob Storage, click on the External option. For connection input, we need to create a new connection to connect to a blob storage. Click on New as shown below.
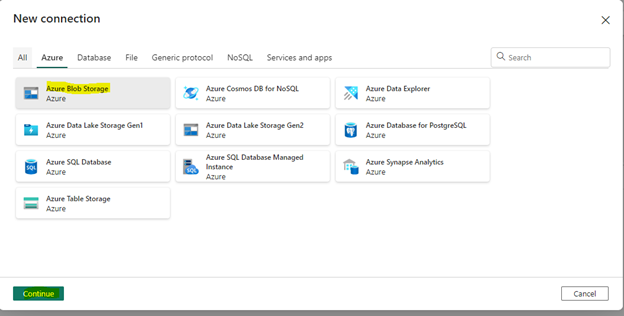
Clicking on New will open a new connection window and it will show the list of all source connectors. Select Azure tab, choose the Azure Blob Storage and click on Continue as shown below.
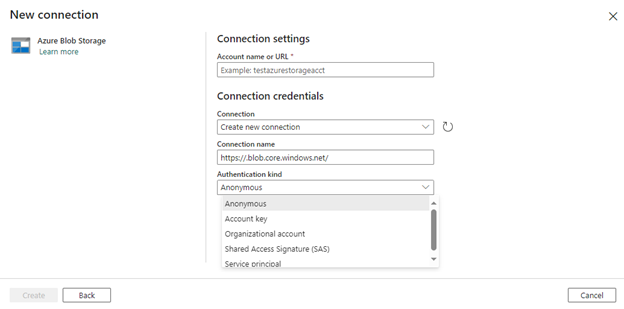
Clicking Continue will open the connection settings window. You will be prompted to fill the information of the blob storage. Enter the URL of the Azure Blob storage, connection name and choose the authentication kind from the dropdown. Click Create.
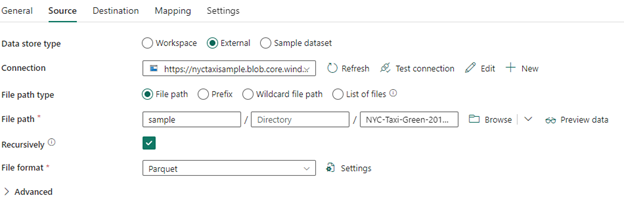
Once the connection is created, it will take you back to the Copy data action. In the same Source tab, let us go ahead and set the file path type to “File path”. Select the source file using the browse option. To see the data in file, click on “Preview data” option.
Setting up the Destination Attributes in Data Factory
Now that we have set the source attributes, let us go ahead and set up the Destination attributes.
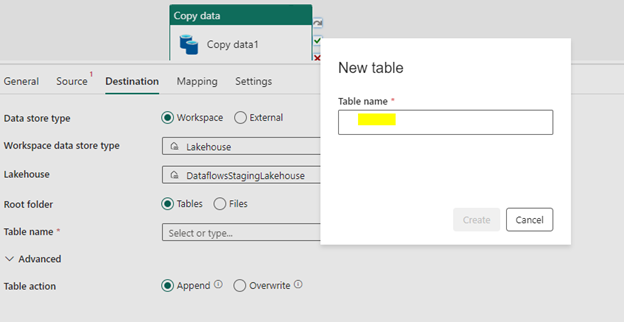
Click on Destination tab and for Data store type input choose “Workspace”. In Workspace data store type, select the target endpoint as “Lakehouse” from dropdown.
If you already have Lakehouse created in workspace, just select the Lakehouse name from the dropdown. Otherwise, create a new Lakehouse. Once you select the Lakehouse, the Root folder option will be visible to choose. Here we can choose any option based on our requirements. In our case, we are trying to convert files to tables, so let us select “Tables”.
For Table name input, select New and specify table name. The Table action input will be as is for now, which is Append.
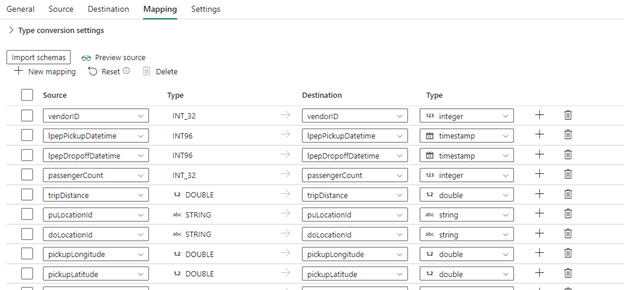
Next, let us go to Mapping tab. Click on Import Schemas to define the mapping. By default, automatically mapped fields will be shown. If not, we can import and manually change the datatypes to target table in Destination as per our requirement. Click Save once everything is done.
Automated Email Notification
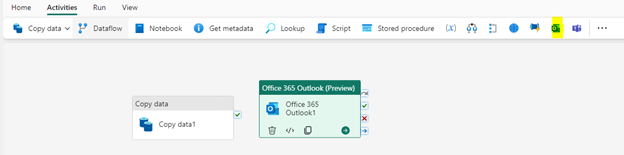
This completes the settings for the selected action. Now, let’s say after the copy, you want to notify any of the internal/external teams through an email notification about the file copy process. To set this, go the Activities tab in the Canvas and choose the Outlook activity icon to add it to the canvas. You can then connect the copy activity to Outlook activity by just selecting the green tick mark and dragging it to right.
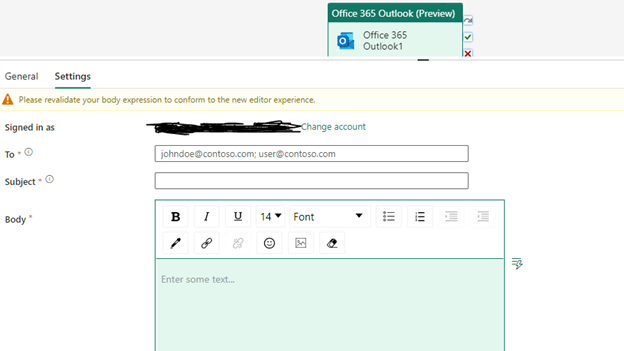
At this point, select the Outlook activity which will show options for General and Settings sections at the bottom of the screen. In the Settings tab, we need to sign in with an authorized service account. For now, you can give your own credentials and sign in. After the login is successful, you will see additional options for details like Subject, To, Email body and designing your mail attachment.
After setting up everything, click on the empty canvas and save it from the Home tab.
Pro Tip: Make sure to validate the pipeline every time before running as it is a good practice to follow. Doing this will list out the errors, if any. Once it is validated, click Run.
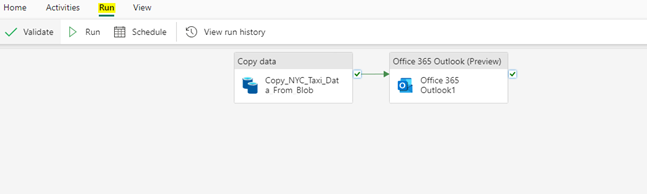
This will trigger the pipeline.
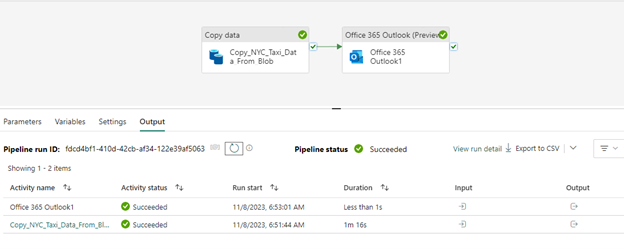
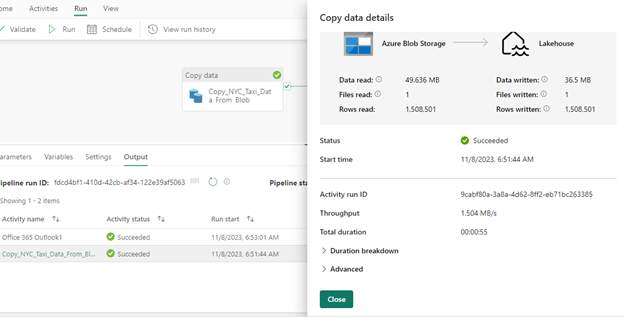
Depending on the data size, the time for the activity run will vary. On successful completion of the pipeline run, the pipeline status will show success along with other pipeline details as shown below.
Wrapping Up
In this blog, we have explained the process of creating data pipelines, and setting up specific operations that copies the data from Microsoft Azure Blob Storage to Lakehouse. We hope you liked this blog article and are enjoying our Data Factory Series using Fabric. Our Next blog in the series will explain how you can load data from a Web API Data Connector to Warehouse. Stay tuned for our next article!