App in a Day Lab Pre-requisites

Pre-requisites: Before starting the hands-on labs.
Note: To participate in the App in a Day training, you require an internet connection, and you will use the web version of the Power Apps Studio, which will run in a browser: Microsoft Edge, Google Chrome, or Safari.
Task 1: Download the Lab Files
1. Download file Lab Files
2. Save a local copy of the lab contents: Download the PAHandsOnLabContent.zip file for the lab from Lab Files.
Save it to a local folder, such as C:\AppInADay. Extract the ZIP package. This package contains the sample data for the app, PDF copies of the lab manuals, and pre-built app packages
Task 2: Sign-in to Power Apps
Find the group you most closely relate to below.
| You are in a classroom led by an instructor. | Follow their direction for all environment set-up details. |
| You are a licensed user of Microsoft products. | Follow step 1 below, and then proceed to the next task. |
| You are starting from scratch with no licenses and no instructor. | Follow step 2 below, and then proceed to the next task |
| You are a licensed user of Microsoft products, BUT your admin has policies in place to restrict your use of Power Apps. | Follow step 2 below using a personal email account, and then proceed to the next task. |
| You are not sure which of the above you are | Follow step 2 below using a personal email account in a private/incognito browser session, and then proceed to the next task |
- Confirm that you are licensed to use Power Apps
Go to Make Power Apps and sign-in with your business or school account. This is the same as your Office 365 or Dynamics 365 login. Sign up for a free developer plan for individual use, see here. If you are not able to use Power Apps with your organizational credentials, you may review the instructions for provisioning a demo tenant in the next step using a personal email.
- Start a trial of Power Apps
Usage of Microsoft Data verse requires a Power Apps premium license. Go to Power Apps Pricing and select the “Try free” option to start a free 30-day trial. For more detailed information on signing up for a free trial, see here. Follow the prompts to set up your free trial of Power Apps.
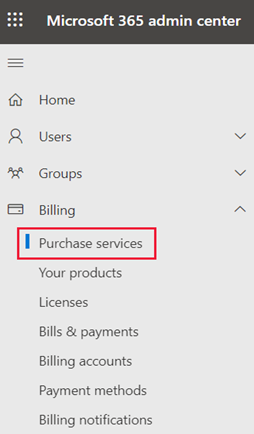
a. You will also need to add a free trial of Office E3 and Power Automate per user. After you have the Power Apps trial set-up, navigate to admin.microsoft.com and select Purchase services from the navigation pane to the left under the Billing section.
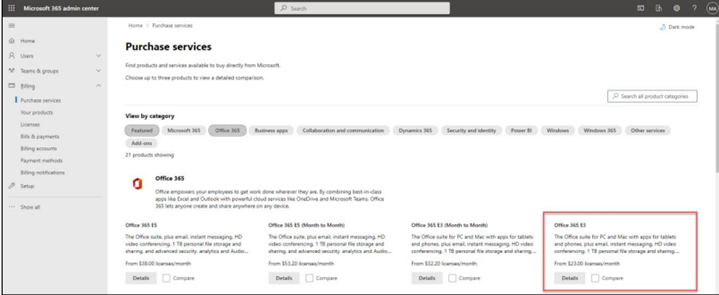
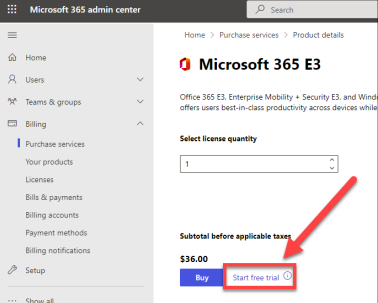
b. Using the product categories search box, search for Office E3. Select the Details button under Office 365 E3. Then, find and select Start free trial.
c. Search for and select Power Automate per user and start your free trial.
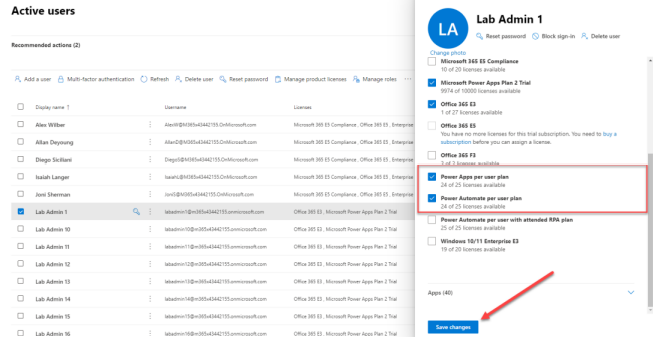
d. Assign licenses for each of these to your Power Apps user. Select Active Users from the navigation pane to the left under the Users section. Select your user, then select Licenses and Apps. Select the desired licenses and Save changes. You may need to refresh your browser to see the changes take effect.
Task 3: Install the Power Apps and Power Automate mobile applications (optional)
1. Install the Power Apps mobile application: Go to the app store on your mobile device. Search for “Power Apps” and install the Power Apps mobile application. If prompted, keep push notifications enabled.
2. Install the Power Automate mobile application: Go to the app store on your mobile device. Search for “Power Automate” and install the application. If prompted, keep push notifications enabled.
Task 4: Create a new environment and Microsoft Data verse database instance
If your environment is being provided for you, you can skip this task.
You must have a newly created Microsoft Data verse environment and database instance, that was created just for this lab. If you don’t have a new environment or have an older environment, follow the steps below to create the environment and provision the database instance.
- Open the Power Apps admin center by navigating to the Power Platform admin center in a web browser.
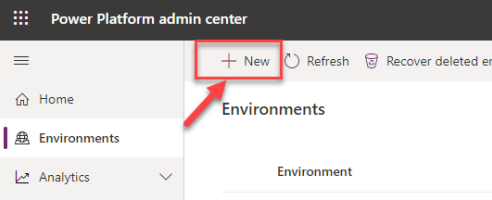
- In the Admin center, select Environments from the navigation menu to the left. Then, choose +New.
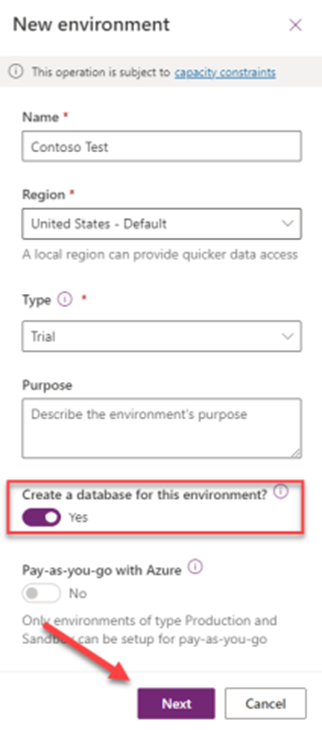
- Provide a name for the environment. A common practice is to use your name followed by “Test” so it is clear this is a test environment.
- Select Trial, select your Region, make sure Create a database is set to Yes, and select Next.
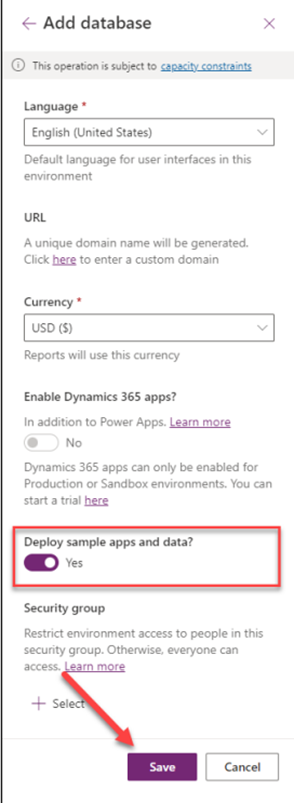
- Select your Language and your Currency. Check Yes for Deploy sample apps and data, and then select Save.
Note: You can choose your local language and currency. However, the lab manuals were created using US dollars and English language configurations.
- You will see a screen listing all environments that will show the newly created environment.
- IMPORTANT: You need to wait for the database to finish provisioning before trying to create an application. The State will change to Ready when done.
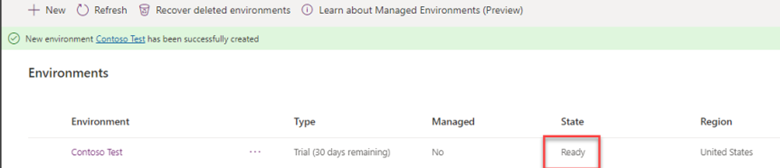
- This may take a few minutes to complete. Wait for it to complete before proceeding with creating an app. If it has been over two minutes, try refreshing the browser. Once the database has been created you should no longer see a “Preparing Instance” message. You can then proceed with the lab,
*Image Credits and Reference: www.microsoft.com