Develop end to end B2B / EDI supply chain solution with Azure Logic Apps – part 3

Develop end to end B2B / EDI supply chain solution with Azure Logic Apps – part 3
Introduction
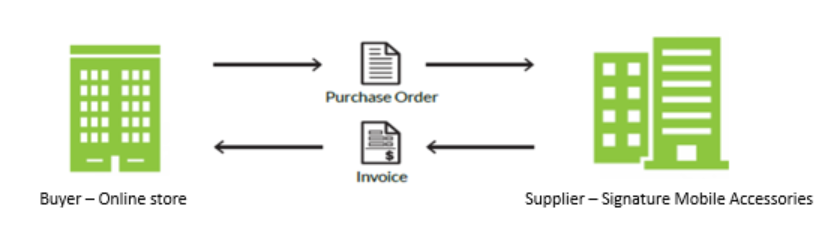
In earlier two posts (part 1 and part 2 ) we discussed about the business scenario where a fictitious Signature Mobile Accessories company need to receive purchase orders (EDI 850) and send invoice (EDI 810) to big online store for Mobiles.
We also went through the purchase order in paper form and EDI document and created schemas and maps and added them to integration account.
In this last post of the series, we would create partners and agreement for B2B communication and add them to integration account. Finally, we would create an Azure Logic Apps work flow to receive EDI 850 purchase order from the online store and load it in Azure SQL database.
Add partners in integration account
Partners are entities which represent you and another organization that participate in business-to-business (B2B) transactions and exchange messages between each other. It is necessary to share information that identifies and validates messages sent by each other.
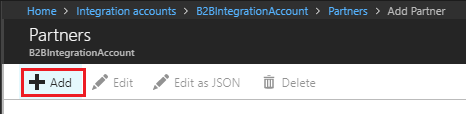
Go to the integration account created earlier in this chapter and select the Partners tiles.
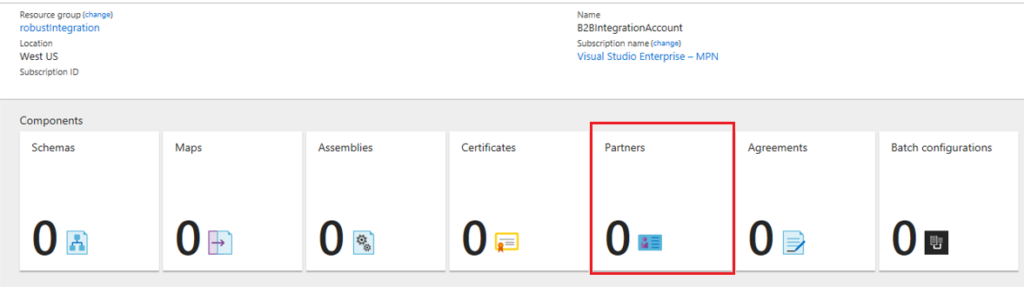
Under Partners, choose Add.
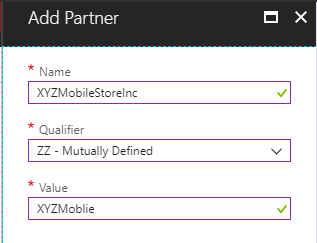
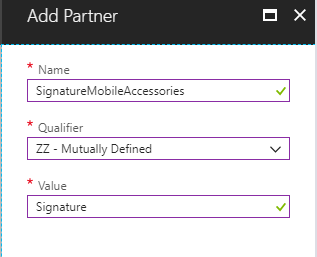
Enter a name for your partner, then select a Qualifier. Enter a Value to identify documents that your apps receive. When you’re done, choose OK.
In our scenario we have two partners – XYZ Mobile Store Inc and Signature Mobile Accessories.
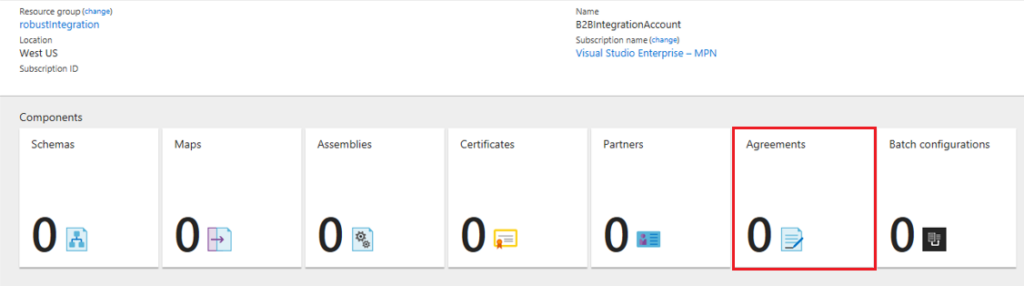
After creating these partners, now we need to create an agreement between them.
Create an X12 agreement
When enabling B2B scenarios for logic apps with the Enterprise Integration Pack, an agreement is a communications arrangement between B2B trading partners. This agreement is based on the communications that the partners want to establish and is protocol or transport-specific. In our scenario its X12 protocol based communication.
Select Agreements tile from the integration account.
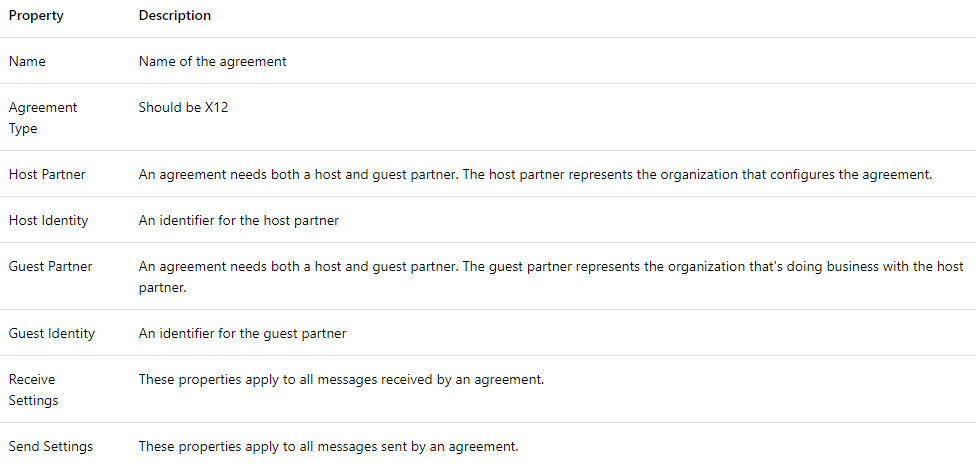
Under Agreements, choose Add. Under Add, enter a Name for your agreement. For the agreement type, select X12. Select the Host Partner, Host Identity, Guest Partner, and Guest Identity for your agreement.
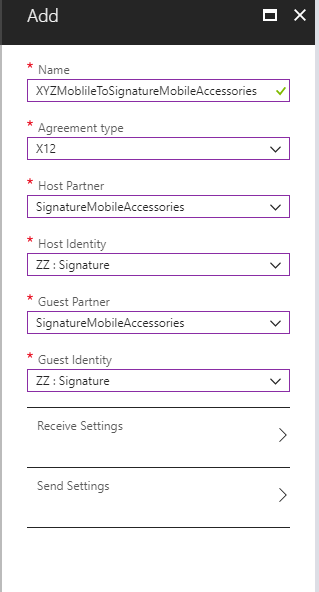
For more property details, see the table in this step.
Now that we have created the agreement properties, we need to configure how this agreement identifies and handles incoming messages received from partner (XYZ Mobile Store Inc) through this agreement.
Under Add, select Receive Settings. Receive Settings is organized into these sections:
• Identifiers
• Acknowledgment
• Schemas
• Envelopes
• Control Numbers
• Validations
• Internal Settings
In our case we would only be adding in Schema setting, for the rest section we would use default values.
Please refer Azure documentation for detailed explanation of all the receive settings.
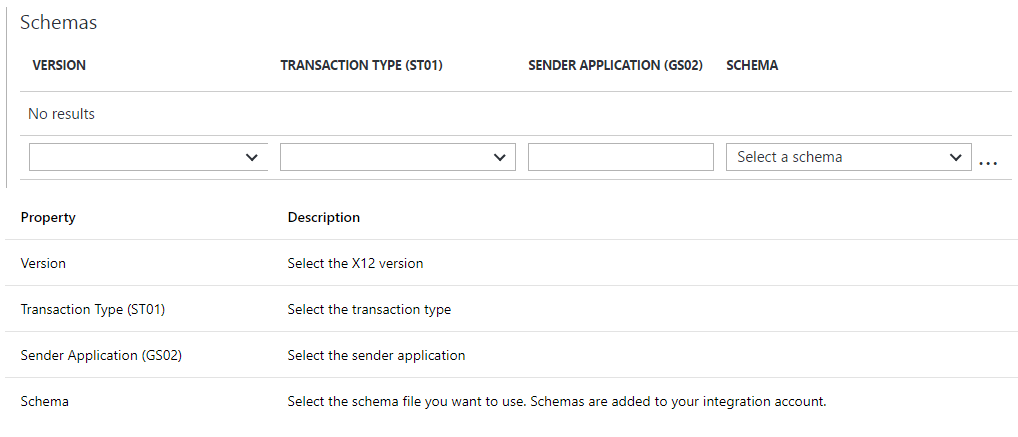
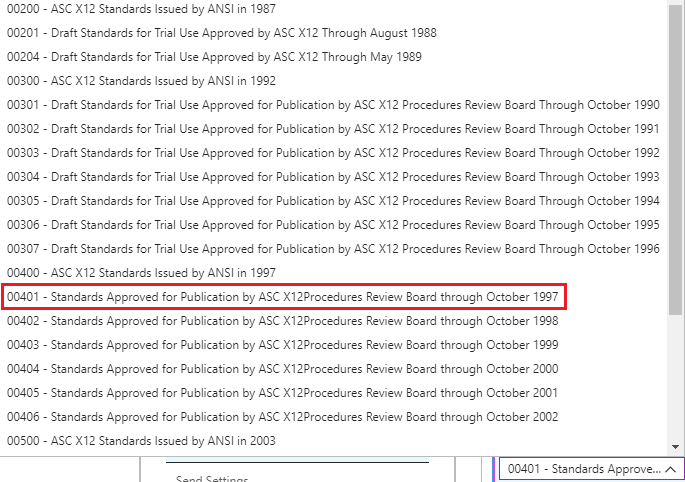
We are using 00401 version in our agreement as shown below.
Transaction type (ST1): 850 -Purchase Order
Sender Application (GS2): XYZMobile
Schema: X12_00401_850
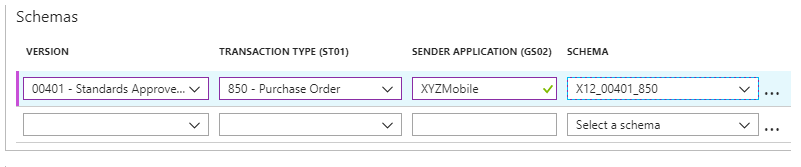
The receive pipeline disassembles the incoming message by matching the values for ST1 and GS2 in the incoming message with the values you set here, and the schema of the incoming message with the schema you set here.
Create Logic App workflow
The next step is to create a Logic App and link the Logic App to the integration account.
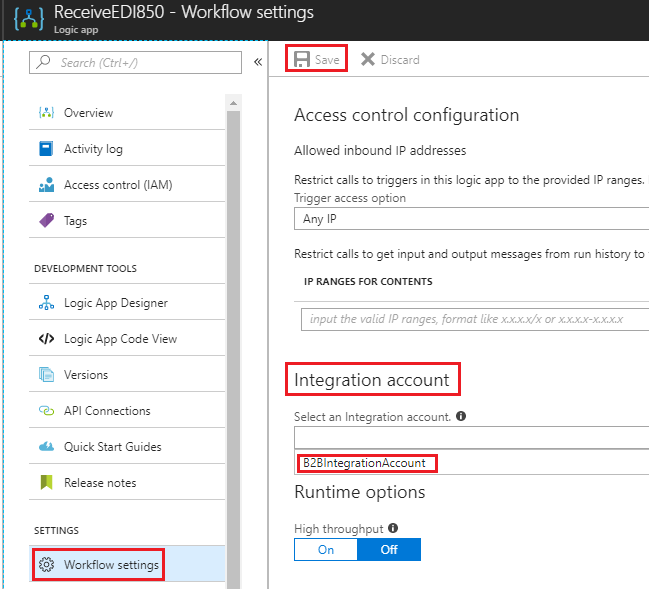
So, I have created a Logic App—Receive850EDI. To link it to the integration account, under Settings section of Logic App, click on Workflow settings.
Now your integration account should show up in the drop-down menu. You select your integration account and click on Save, as shown here:
Now we back to Logic App and start using the integration account artifacts there.
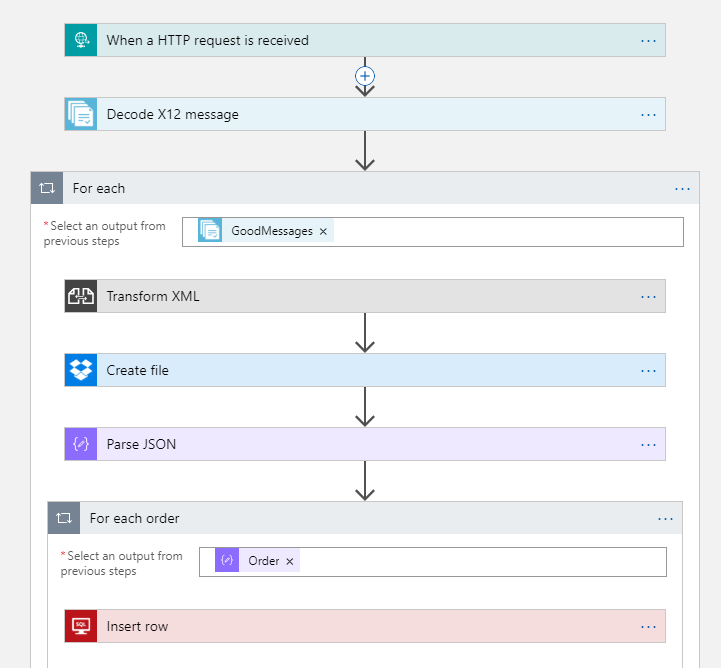
Once we receive the EDI 850 Purchase order in the above Logic App workflow, the first step is to decode the EDI document to XML document using Decode X12 message action.
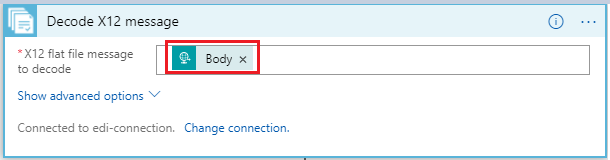
Here we select the body of the HTTP request which is the EDI 850 flat file message that triggers the logic app.
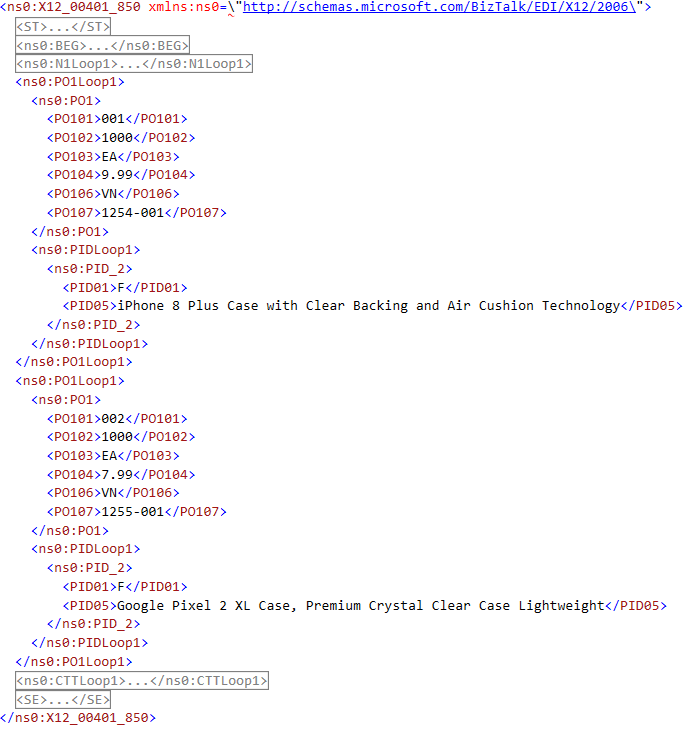
Now for each good order message in the EDI 850 transaction set, the map will be executed to transform the message from 850 EDI XML to Order XML.

Here is the output of the Transform XML action.
Next, we need to iterate through the orders in the message and insert them in the database. To insert the order to database we would use the SQL connector, which takes JSON message.
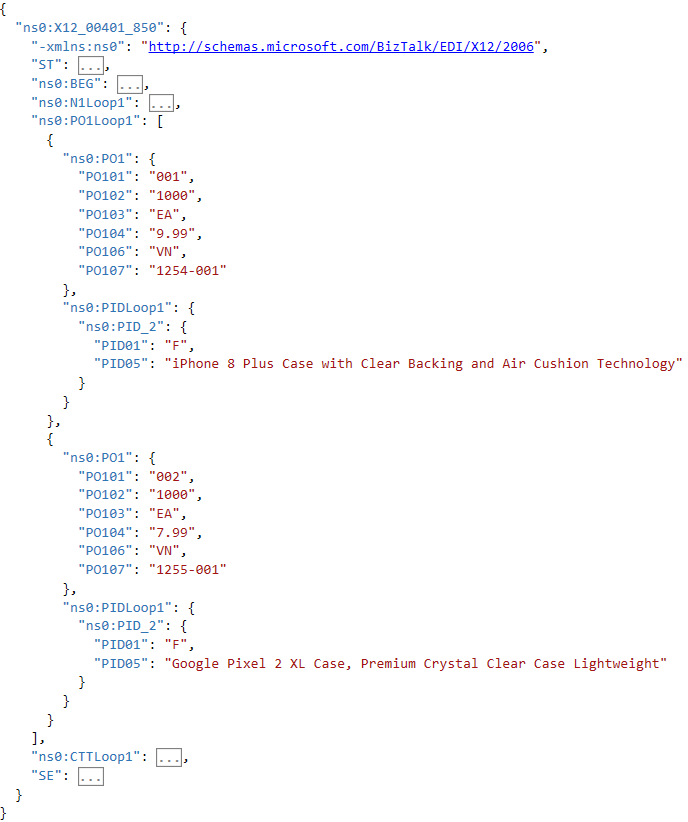
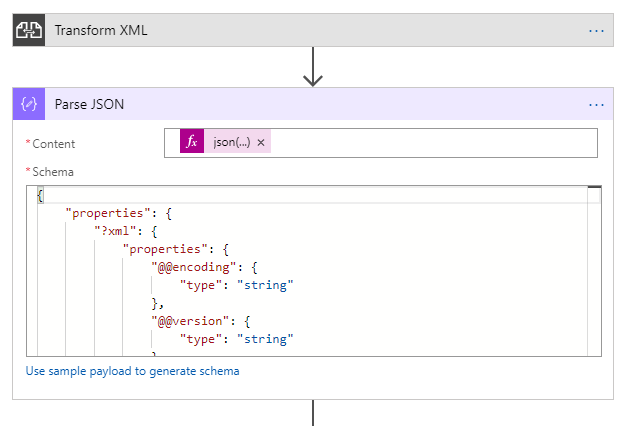
So, we would first convert to JSON message using one of the free online tool and use the message to generate the JSON schema as shown below.
We need to write the expression to convert the Order xml message to Order json message.
json(body(‘Transform_XML’))
Once we have the order message in json format, we can use the SQL connector to insert the order message in database.
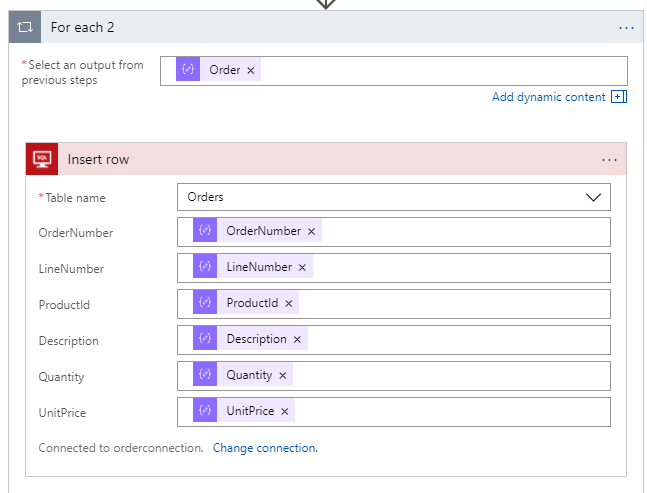
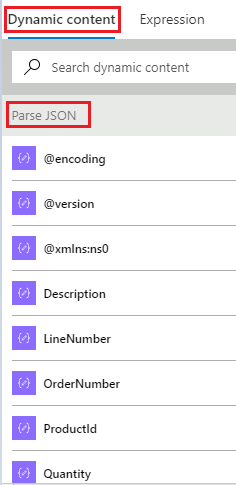
You can see in the diagram below how we can populate the field details of the table which comes as Dynamic content from the Parse JSON action.
Now save the Logic App to create the URL endpoint in the Request trigger, as follows:

Copy the complete URL by clicking on the copy button as shown in the preceding screenshot. Now we can use this URL to test the workflow using the Postman application
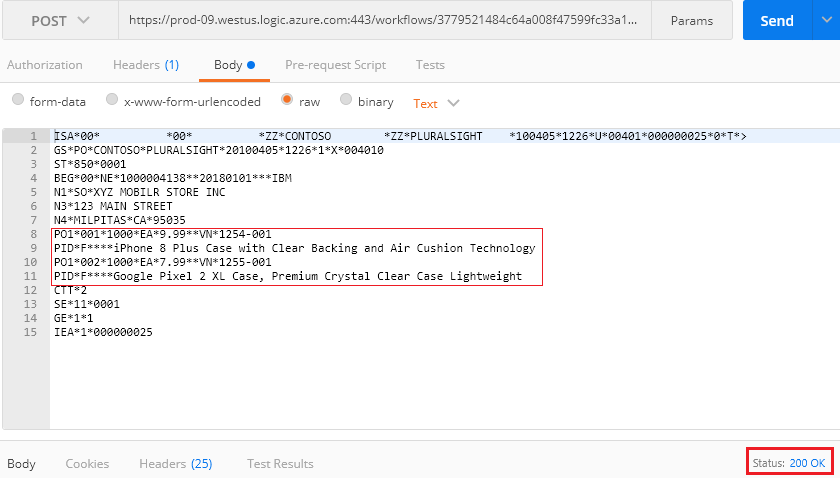
If your logic app runs successfully you should she both the order created in your database.

In conclusion, the Logic App workflow takes in a EDI 850 flat file, decodes it to the XML message of EDI 850 purchase order, then transforms it to your internal order xml message which in turn gets converted to JSON message and inserted to SQL database using SQL connector.
This Logic App now can be extended in various way. For example, instead of HTTP
Request trigger, we can use FILE or FTP trigger, and instead of inserting the JSON order message to Azure SQL database, it can be pushed to the Service Bus queue / topic so that it can be subscribed by the on-premise line of business systems or any other downstream system.
Summary
This blog post completes the series to show how can you build an B2B EDI integration solution from the scratch in Azure using Logic Apps and Integration account.