Develop end to end B2B / EDI supply chain solution with Azure Logic Apps – Part 2

Introduction
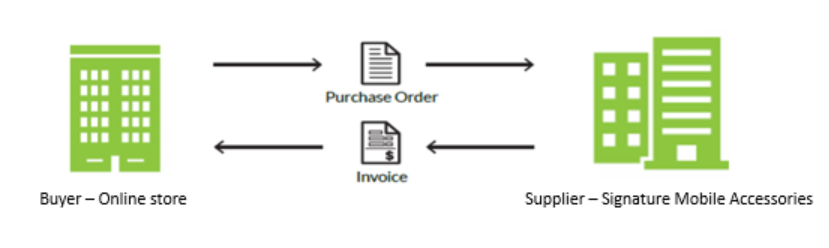
In last post we discussed about the business scenario where a fictitious Signature Mobile Accessories company need to receive purchase orders (EDI 850) and send invoice (EDI 810) to big online store for Mobiles as an Azure Logic Apps example use case.
So how does a purchase order in paper would look like? You might have seen it before, here is a sample purchase order.
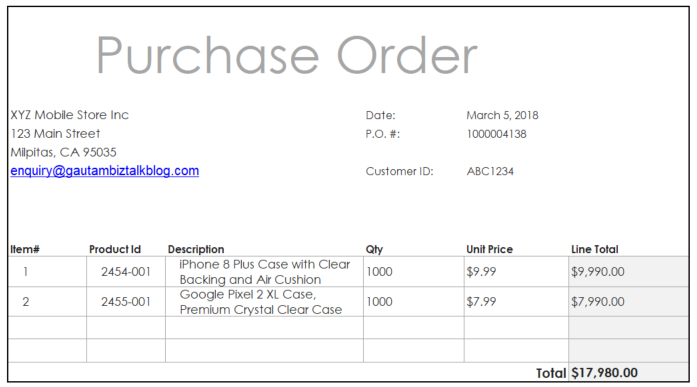
An EDI 850 purchase order needs to contain all the information that would be in the paper document of the same type. For example, it should specify company name, address, phone, and the products you wish to purchase, the quantity of each product, and so on.
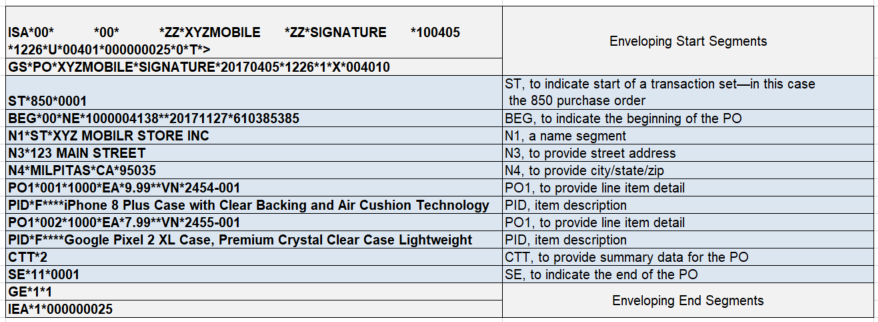
In an EDI document, each piece of information is called a “data element” and each line of data elements a “segment.” Each data element is in a specific position on a specific line or segment.
A single EDI business document such as a Purchase Order, or Invoice is called a “transaction set” or “message.”
When you create an EDI document such as a Purchase Order, you must adhere to the strict formatting rules of the standard you are using, such as ANSI X12 or EDIFACT. These rules define exactly where and how each piece of information in the document will be found, that is, in which segment and in what position within that segment.
Figure below shows how the above paper purchase order would look after translation into the ANSI X12 EDI format.
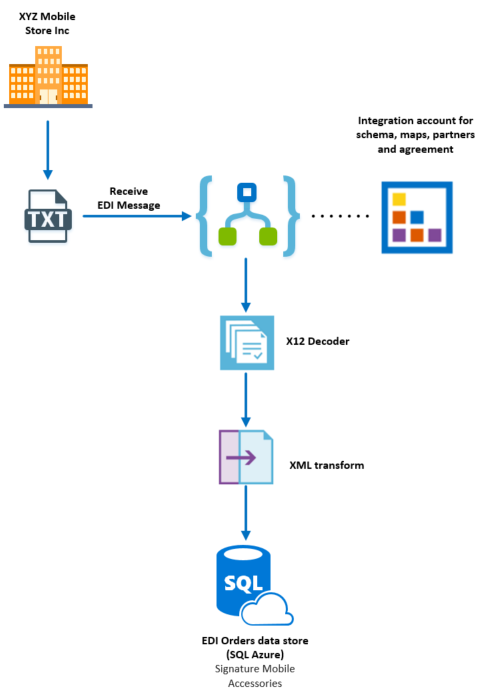
Buyer (XYZ Mobile Store Inc) would send EDI 850 document which need to be received by the B2B\EDI application in the Azure Logic Apps and then it need to be decoded to XML using X12 Decoder.
Once we have EDI 850 XML, it need to be transformed to another XML schema using XML transform.
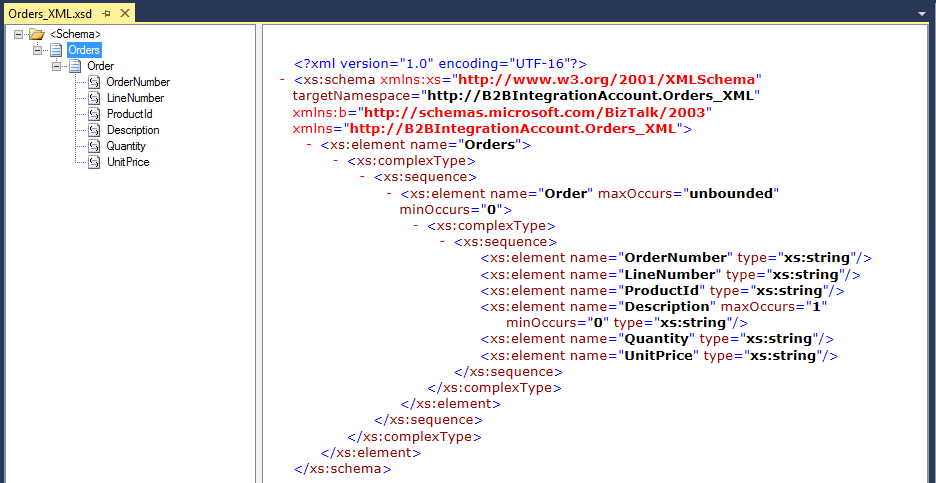
Transformed message will have all the required fields to create order in the SQL database.
Order
· OrderNumber
· LineNumber
· ProductId
· Description
· Quantity
· UnitPrice
Below is the diagram for the complete EDI 850 receive work flow.
Create schema and maps for the Azure Logic Apps example
We would need to create schemas and maps for our solution and add them to integration account.
Pre-requisites
· Visual Studio 2015
· Azure Logic Apps Enterprise Integration Tool
· EDI X12 Schema
For this schema and maps development you can use your local machine or spin up a VM in Azure.
I would prefer Azure VM, so go to Azure portal, click on Create a resource and search Visual studio 2015
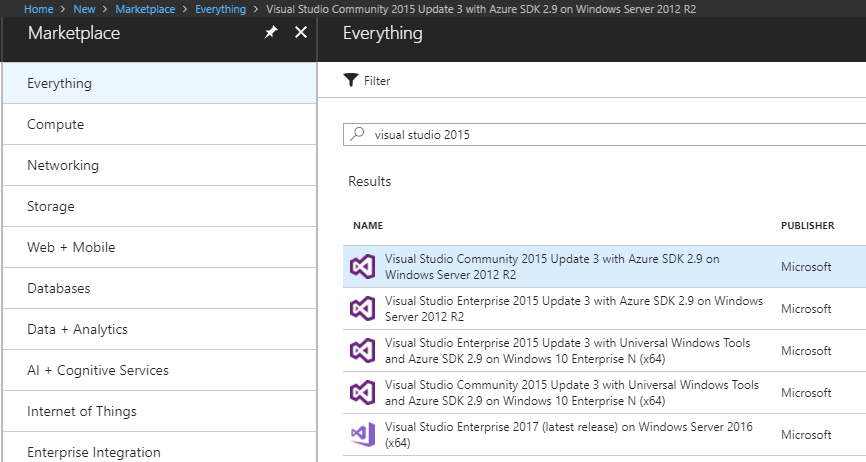
Select Visual Studio Enterprise 2015, with Resource Manager as deployment mode click on Create.
Now we need to have following on this VM:
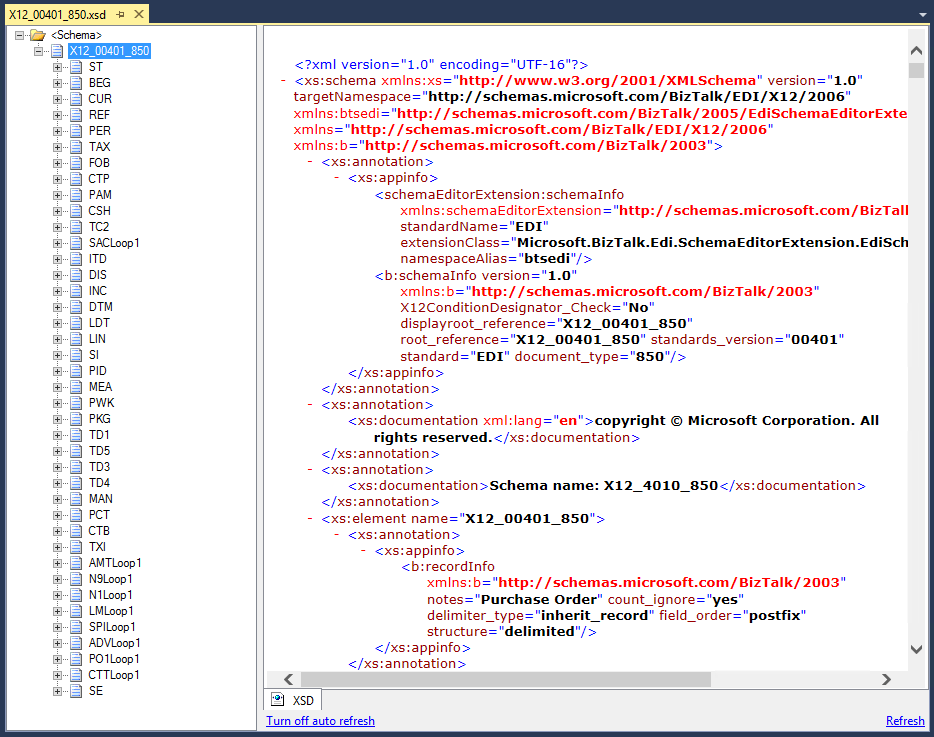
1. EDI Schema (X12_00401_850.xsd) – X12 schemas are available to download at http://go.microsoft.com/fwlink/p/?LinkId=235057
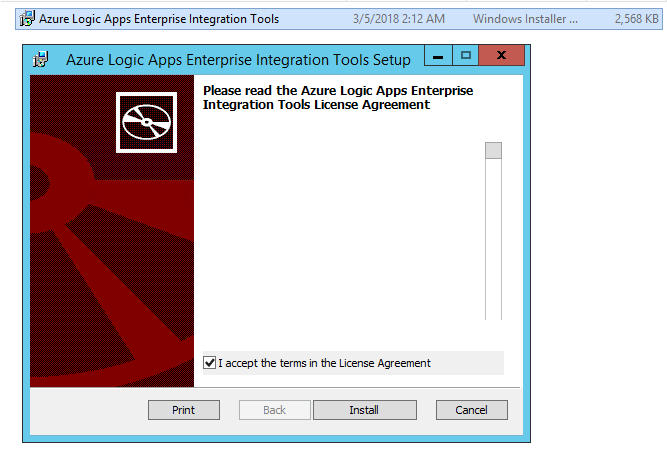
2. Azure Logic Apps Enterprise Integration Tools for Visual Studio 2015 2.0 https://marketplace.visualstudio.com/items?itemName=VinaySinghMSFT.AzureLogicAppsToolsforVisualStudio-18551
Azure Logic App Tool is basically an Enterprise Integration Tool, which is actually a Visual Studio extensions that give you the BizTalk schema editor and mapper in Visual Studio 2015.
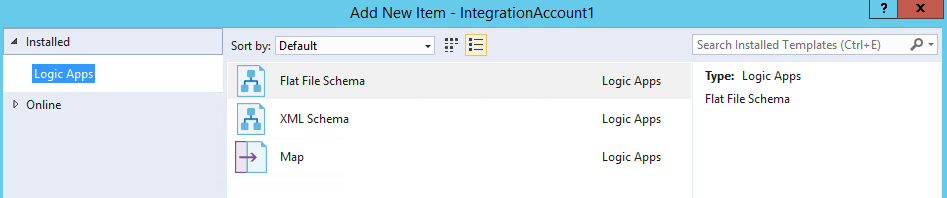
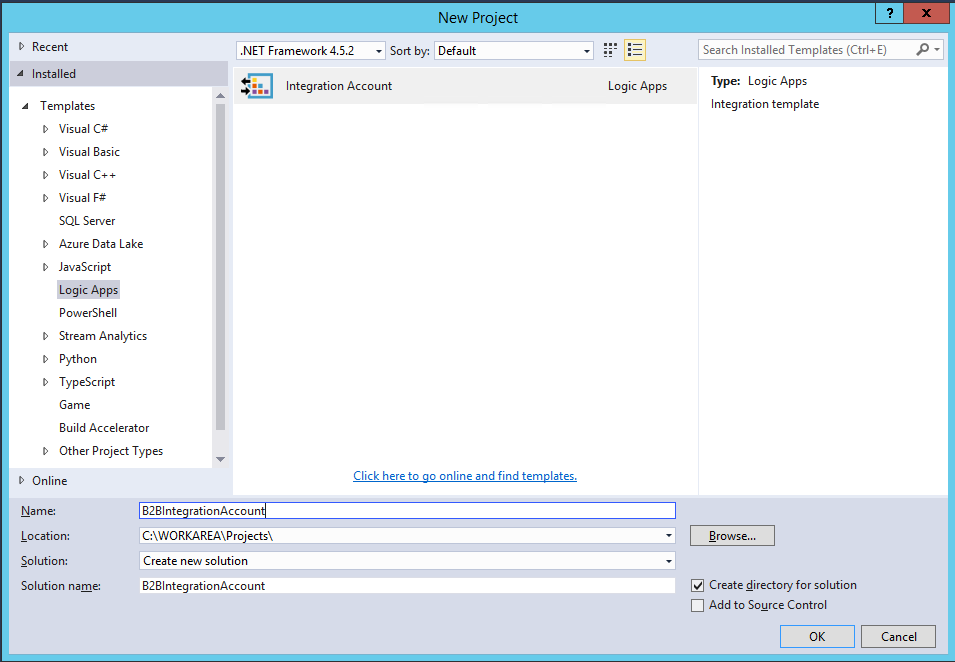
Once you have the EDI Schema and Enterprise Integration Tool installed on your VM, open the visual studio and create a new Integration Account project.
Add the EDI schema X12_00401_850.xsd to this project.
Create a new XML schema Orders_XML.xsd
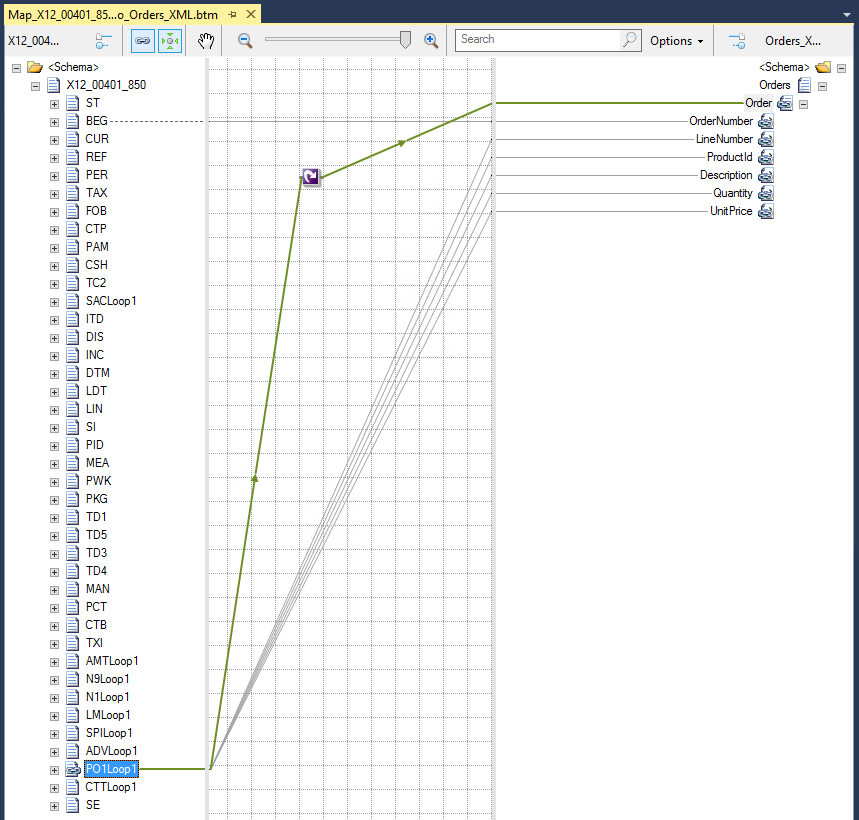
Now create a map for the transformation of X12_00501_850 to Orders_XML. You would need to use the Looping functoid to map multiple PO records in the EDI 850 XML schema to multiple Order in Orders XML schema.
Testing the Map
Before you upload this map to integration account it need to be tested.
Generate an Instance of EDI Schema (X12_00401_850.xsd)
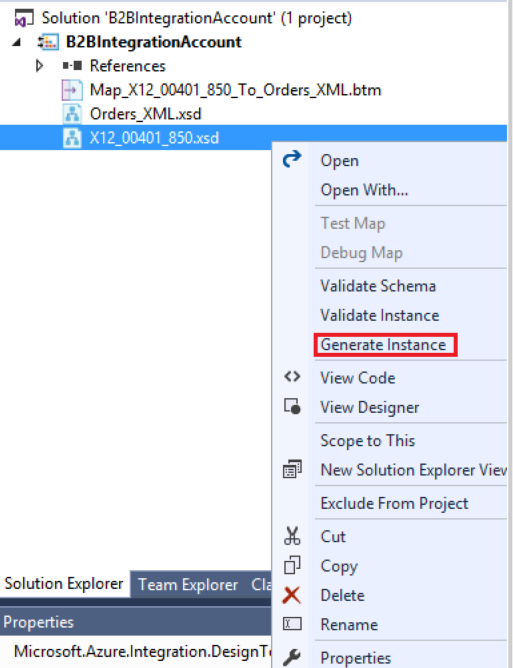
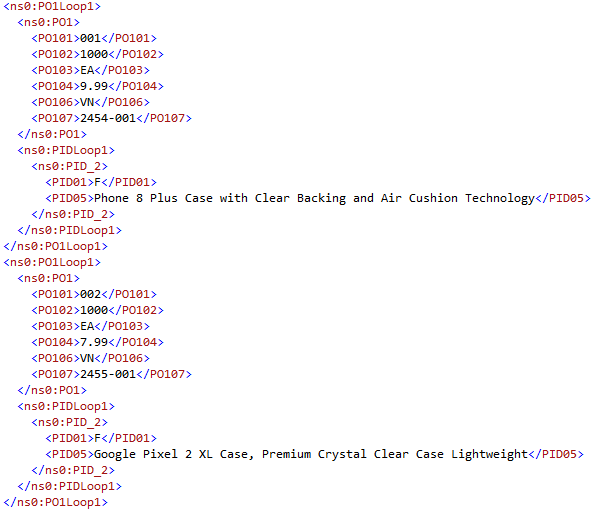
You need to generate the instance of the EDI 850 Schema and populate the PO1 Loop (Order segment fields) as shown below. You would use this xml message as the input to the map.
Refer the MSDN link for further detail https://docs.microsoft.com/en-us/biztalk/core/generating-an-instance-edi
Test the Map
Right-click the map and click Properties. Set TestMap Input to XML
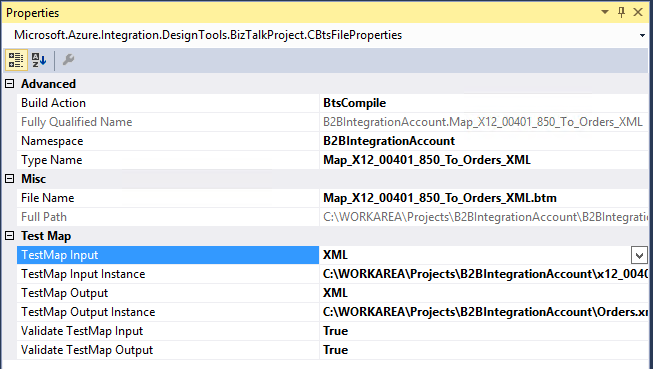
For TestMap Input Instance, browse to the instance we EDI schema we create above.
For TestMap Output Instance, browse to the location you want to save the output instance at, enter a name for the output instance, and then click Save
Right-click the map you are testing, and then click Test Map.
Now check the output which is the Orders message in the location you set for output instance
Please refer the MSDN link for further detail https://docs.microsoft.com/en-us/biztalk/core/testing-a-map
Add schema, maps the integration account
Now we need to upload the schemas and map to integration account so that we can use them in Logic Apps. Integration account does not take the DLLs, so we need to upload the raw XSD and XSLT maps.
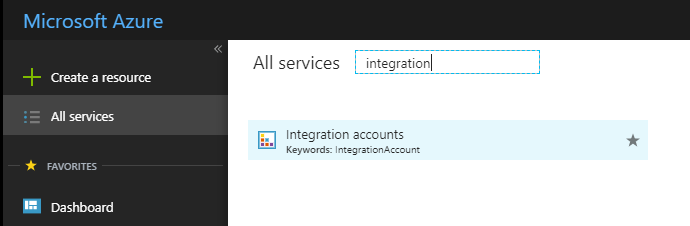
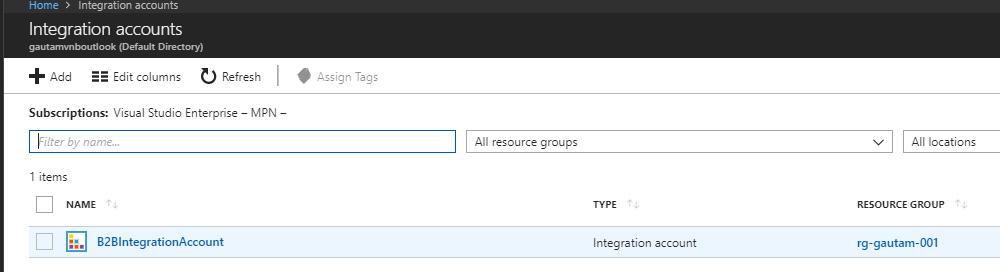
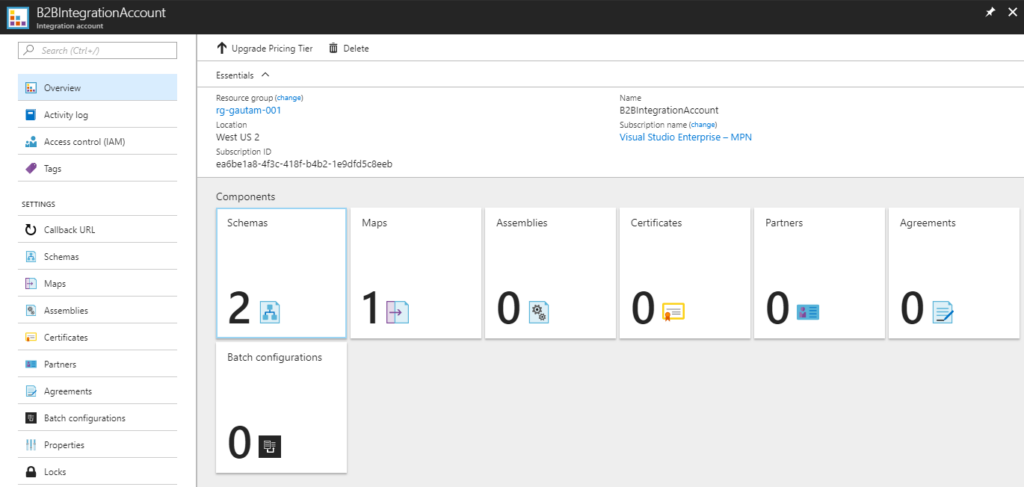
Go to the Azure portal, select All services. In the filter search box, enter integration, and select Integration Accounts as shown below.
Now Select the integration account where you want to add the schema.
Add Schemas
Choose the Schemas tile, then click on Add and upload both the schemas
- X12_00401_850
- Orders_XML
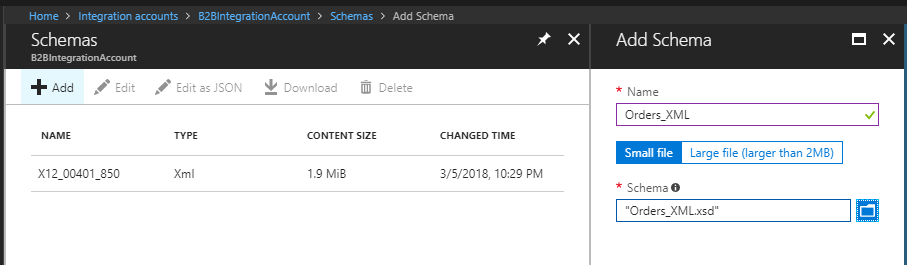
After the upload process completes, select OK.
Add Map
Now choose the Maps tile, then click on Add and upload the map (xslt file)
- Map_X12_00501_850_To_Orders_XML
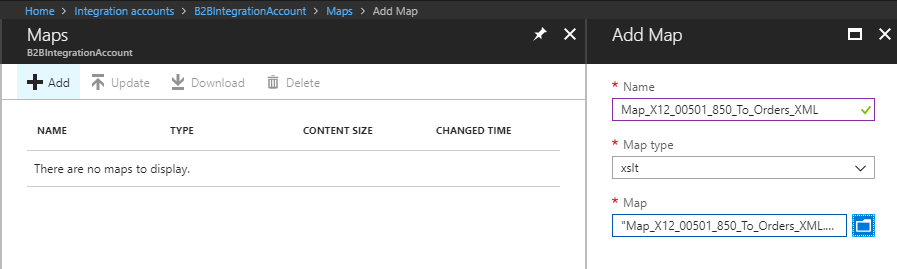
To upload the map file, choose the folder icon on the right side of the Map text box. After the upload process completes, choose OK.
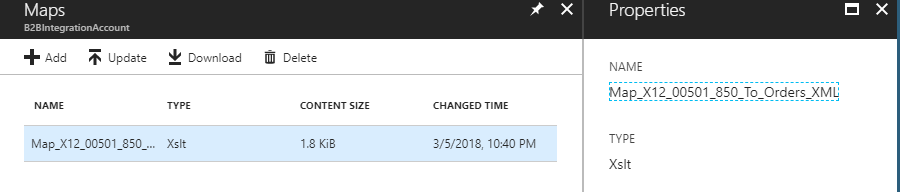
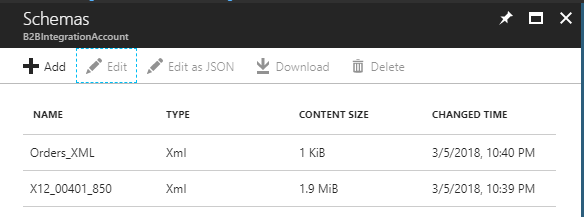
Now inintegration account, your newly added schemas and map should appear.
Summary
In this blog post went through the purchase order in paper form and EDI document. Then we created
- schemas for EDI 850 and Orders.
- Map for transforming the EDI 850 message to Order message
Finally, we added the schemas and map to integration account so that we can use them in Logic Apps.
In next post we will learn how to set up the Partners and agreement between them.
- Buyer – XYZ Mobile Store Inc
- Supplier – Signature Mobile Accessories