Secure VM in Azure

Major corporations across the world have been hit by a wave of ransomware attacks that encrypt computers and then demand that users pay $300 to a bitcoin address to restore access due to poor Azure VM security or poor cybersecurity development and network standards.
While countries across Europe — the United Kingdom, Ukraine, Spain and France, to name a few — were hit hardest by the outbreak, the virus has now spread to the United States.
Recently a hospital, based in Greenfield, Ind., revealed that a successful ransomware attack on Thursday held the hospital’s IT systems hostage, demanding a ransom payment in Bitcoin (BTC) in return for a decryption key.
To take care of the recent security concerns, we will be publishing series of blog pots on how to secure your Azure IAAS and improve your Azure VM security. This would help to implement a secure environment.
In this blog we will talk about monitoring and securing any Virtual Machine(VM) on Azure VM cloud end to end.
Machine preparation and Preventive Actions:
Important steps or actions which needs to be executed after creation of nay VM on Azure Portal. This helps to better secure and monitor the VM.
1. Create VM by choosing the appropriate OS version and other Hardware details. Please make a note of username and password supplied while creating a VM.
2. Once the VM provisioning is completed. Browse to the IP address of the VM and Make it static. this prevents IP change every time the machine is restarted.

3. Browse to the Blade of the Virtual machine, Go to Setting->Extensions and add Microsoft Antimalware extension. This would help to setup windows Defender on the VM.

4. Encrypt the Virtual Machine. Please follow the below steps to encrypt the VM.
a. Login to VM and Open Windows PowerShell command Prompt as “Run as Administrator”.
b. Run: Install-Module -Name AzureRM -AllowClobber
c. Run: Import-Module -Name AzureRM
d. Run: Connect-AzureRmAccount. It will prompt to supply Azure Credentials.
e. Run: Select-AzureRmSubscription –SubscriptionId
f. Run the script ADEPrereqScript.ps1. you can download the script from
Please store the generated Info.
g. Run: Set-AzureRmVMDiskEncryptionExtension -ResourceGroupName $resourceGroupName -VMName $vmName -AadClientID $aadClientID -AadClientSecret $aadClientSecret -DiskEncryptionKeyVaultUrl $diskEncryptionKeyVaultUrl -DiskEncryptionKeyVaultId $keyVaultResourceId -VolumeType All
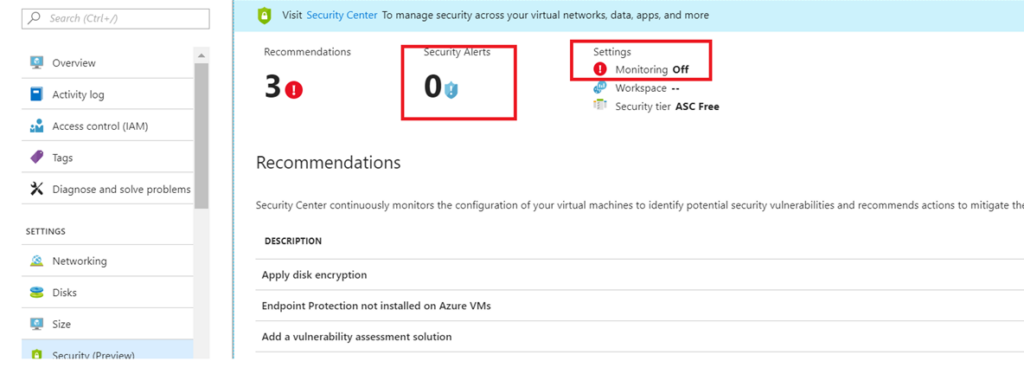
5. Browse to the Blade of the Virtual machine, Go to Setting->Security and enable Monitoring and configure Alerts on security Center.

6. Browse to the Blade of the Virtual machine, Go to Setting -> Networking and enable IP Restriction on Inbound Port and Outbound Port Rules.

7. Browse to the Blade of the Virtual machine, Go to Operations->Backup and enable Default backup of VM’s.

8. In case the VM is added to a Virtual Network or On-premise Network, perform the following steps to better troubleshoot connectivity. It will assist in validating issues and overall connections.
a. Allow ICMP (copy and paste to command prompt with admin level):
netsh advfirewall firewall add rule name=”ICMP Allow incoming V4 echo request” dir=in action=allow enable=yes protocol=icmpv4:8,any
b. Install Telnet (copy and paste to command prompt with admin level):
pkgmgr /iu:”TelnetClient”
c. PS PING (download, extract to systems32 folder):
https://technet.microsoft.com/en-us/sysinternals/psping.aspx
The above tools in any combination will allow us to provide faster resolution with communication issues. For example, Telnet can be used to identify if an actual port is available and passing traffic.


