Policies in Azure API Management

Introduction
APIs have become the engines of growth in today’s economy, and are fundamentally changing the way organizations do business.
Azure API management (APIM) helps organizations publish APIs to external partner, and internal developers to unlock the potential of their data and services.
Azure API management is a proxy that sits between your back-end services or APIs, and the calling applications. So, think of this proxy as an intermediate layer, and this intermediate layer sits well with the distributed architecture of the web, where systems are comprised of multiple layers, each layer is made up of HTTP, and each layer provides additional capabilities.
In a nutshell, APIM helps you to
· Package and publish APIs to developers and partners
· On-board developers via a self-service portal
· Ramp-up developers with docs, samples, and API console
· Build an API façade for existing backend services
· Reliably protect published APIs from misuse and abuse
· Gain insights into API usages and health from analytics report
Policies in Azure API Management
In Azure API Management (APIM), policies are a powerful capability of the system that allow you to change the behavior of the API through configuration.
Policies essentially are a bunch of statements, and think of it as a programming language almost, and just like in any programming language you have statements, so does the policy definition have statements.
Popular Statements include format conversion from XML to JSON and call rate limiting to restrict the amount of incoming calls from a developer.

Refer the below Azure documentation link for the entire list of policies available.
https://docs.microsoft.com/en-us/azure/api-management/api-management-policies
Policy Configuration
The policy definition is a simple XML document that describes a sequence of inbound and outbound statements.
The configuration is divided into inbound, backend, outbound, and on-error.
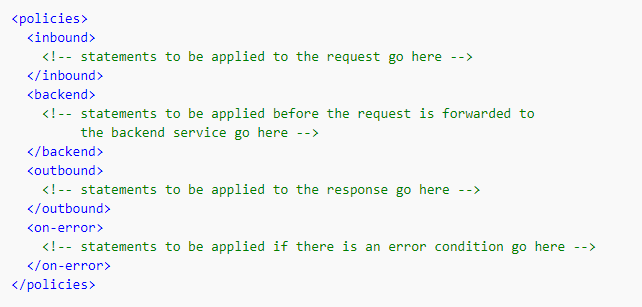
Much like a C# snippet, you can place policy statement in any of these sections.
You can place your policy snippet or the statements inside the inbound section, and by doing so, these statements will be applied to the incoming request.
You can place the snippet inside the back-end section, and in this case, all the statements that make up that snippet will get applied just before the request is forwarded to the back-end.
You can also place your policy statements inside the outbound section, and once again as the name suggests, these statements will be applied to the response before it has returned to the caller.
And if an error is encountered while executing statements in any of these sections, the statement within the on-error section will get executed, so think of this as your try-catch block if you will.
Azure Policy Expressions
Policy expressions are well-formed, C# 7.0 expressions.
You can see some examples below, it can be a single statement @ sign within parentheses, or it can be a collection of statements, @ sign within curly braces. The only requirement is that every code path ends in a return statement.
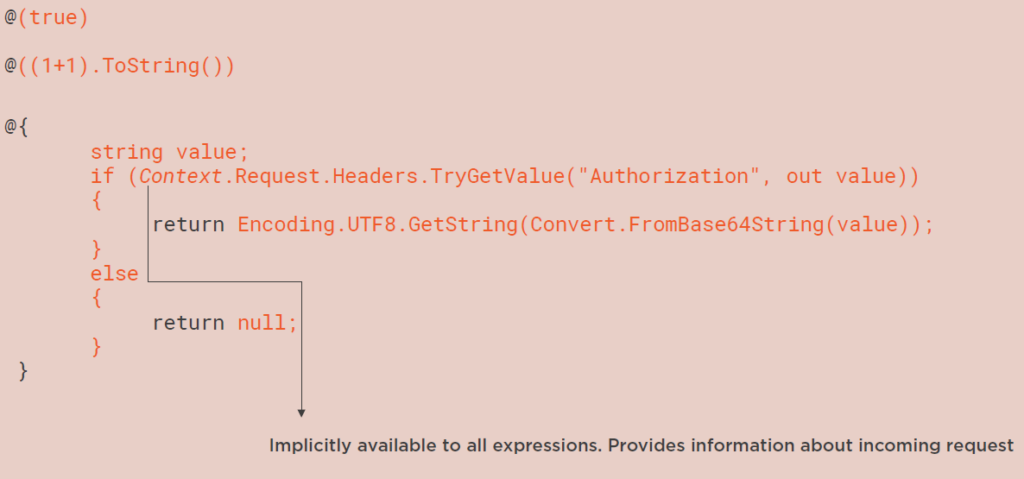
Furthermore, each expression can have access to something called a context, and this context provides information about incoming requests. So, you can access this information about the incoming request in a read-only manner, and make some interesting decisions based on that.
In addition to the context, all expressions have access to a subset of the .NET framework, and you can go through the documentation and look at all the .NET types that are available. But as you can see here, the expressions become powerful, they are nothing but C# snippets.
You have access to the context, you have access to many .NET types, and combine these two, you can write some logic, which is then compiled using the Roslyn compiler, and then inject it into the flow as your calls are coming from your end users, and being directed to the back-end API.
Creating Azure Policies
Now that we discuss about the policy concept, configuration file and the various section, it’s now time to put this knowledge into action.
We would create couple of policies in this section.
Here I have used a sample product API, hosted in Azure. Swagger UI for product API is shown below
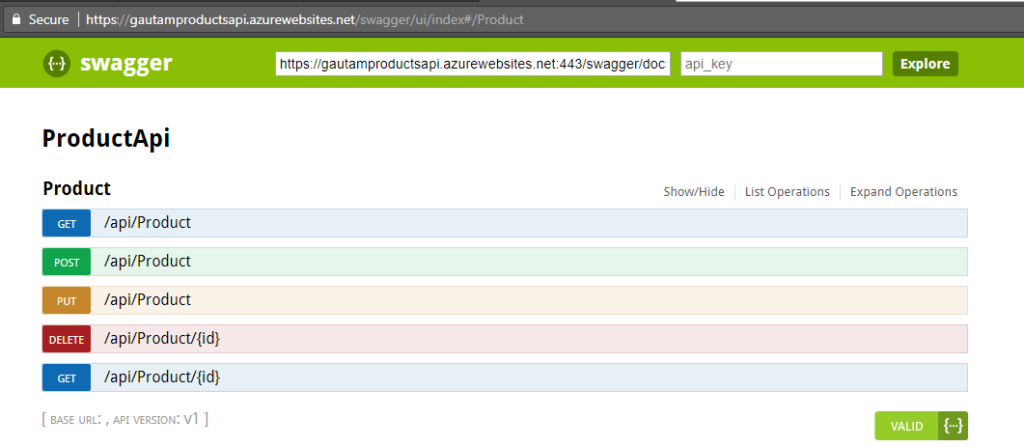
This is a very basic API for CURD operation of a product item.
We would need the swagger json file to add/import product API in Azure API management. To get the swagger file you need to append “/swagger/docs/v1” in your API end point (Example: https://gautamproductsapi.azurewebsites.net/swagger/docs/v1).
Save the swagger document as json file.

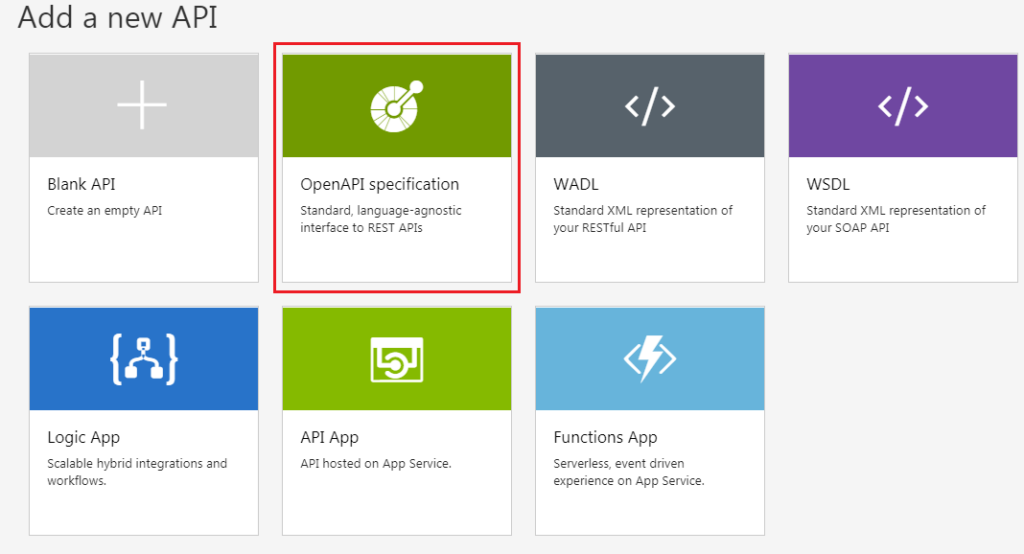
Now create an instance of API Management and then import the API by selecting “OpenAPI Specification” tile as shown below.
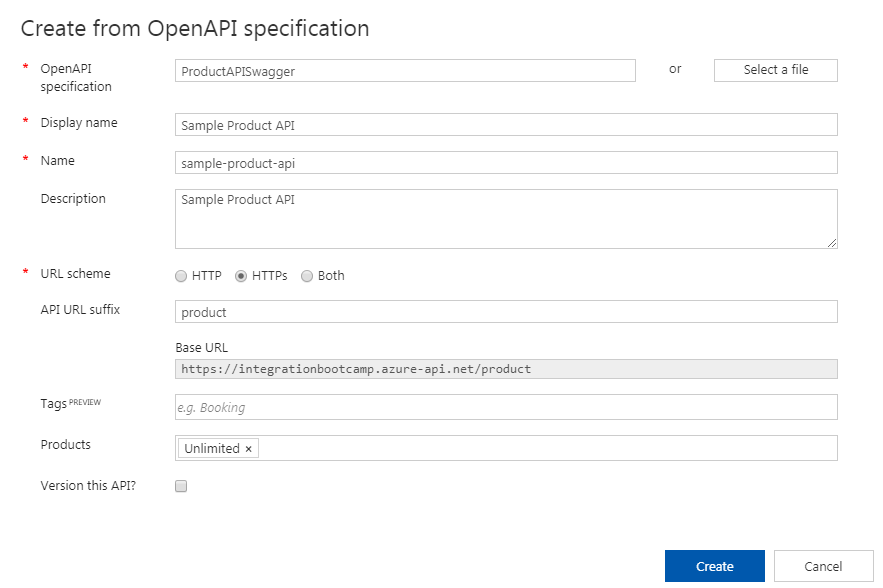
Select the Swagger file which we have created before. Fill in the required details – Display name, Name, API URL suffix and Product and click on Create.
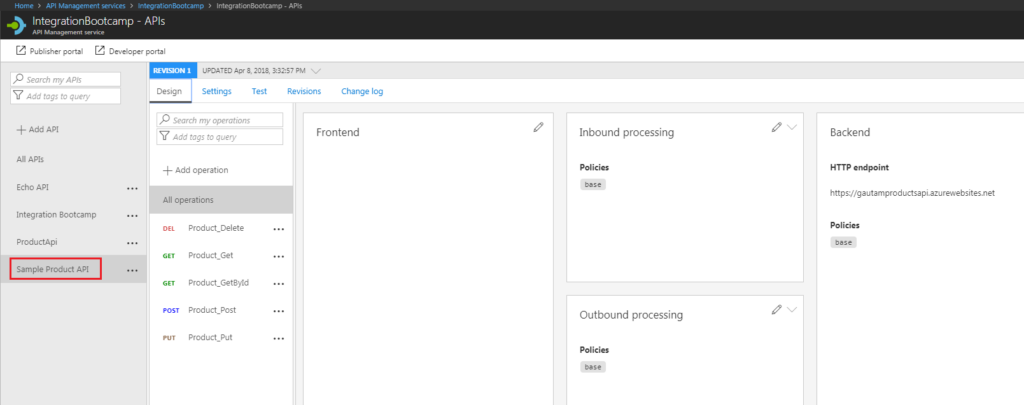
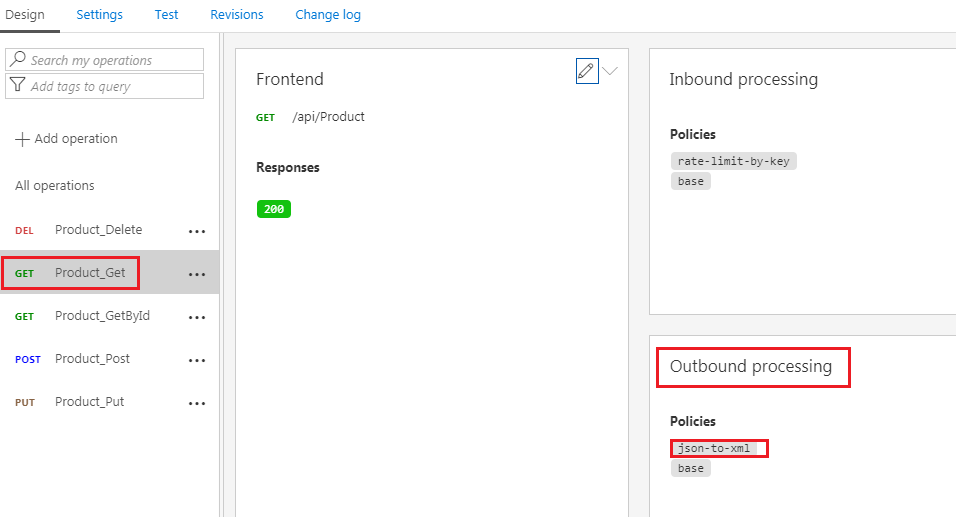
Now you have new API (Sample Product API) created in API Management. You have all the operations and different sections – Front end, Inbound Processing, Backend, and Outbound Processing.
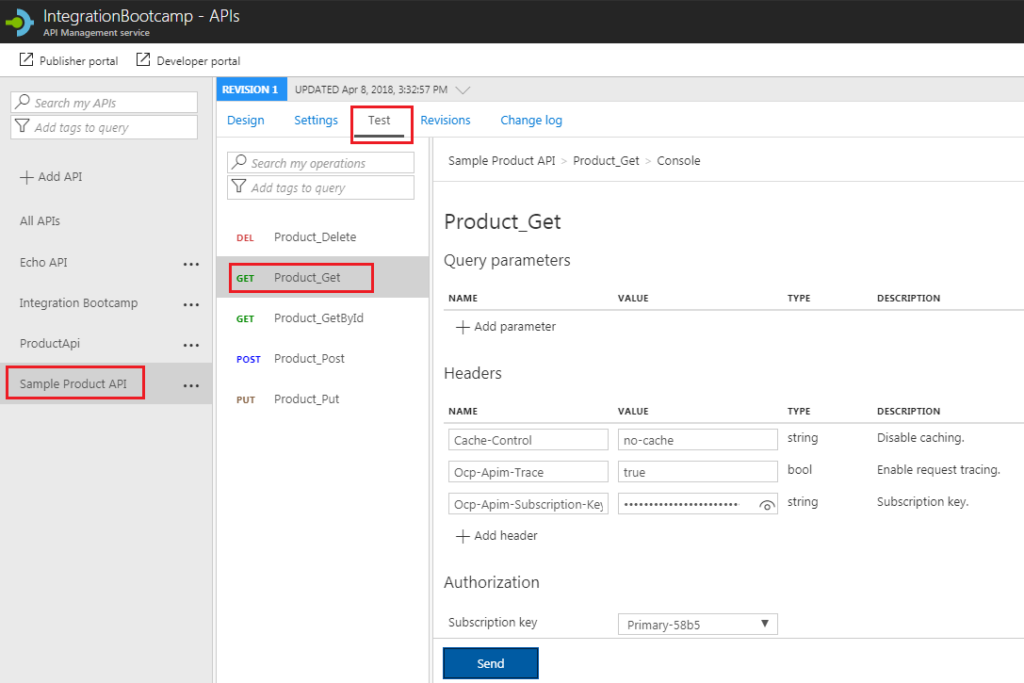
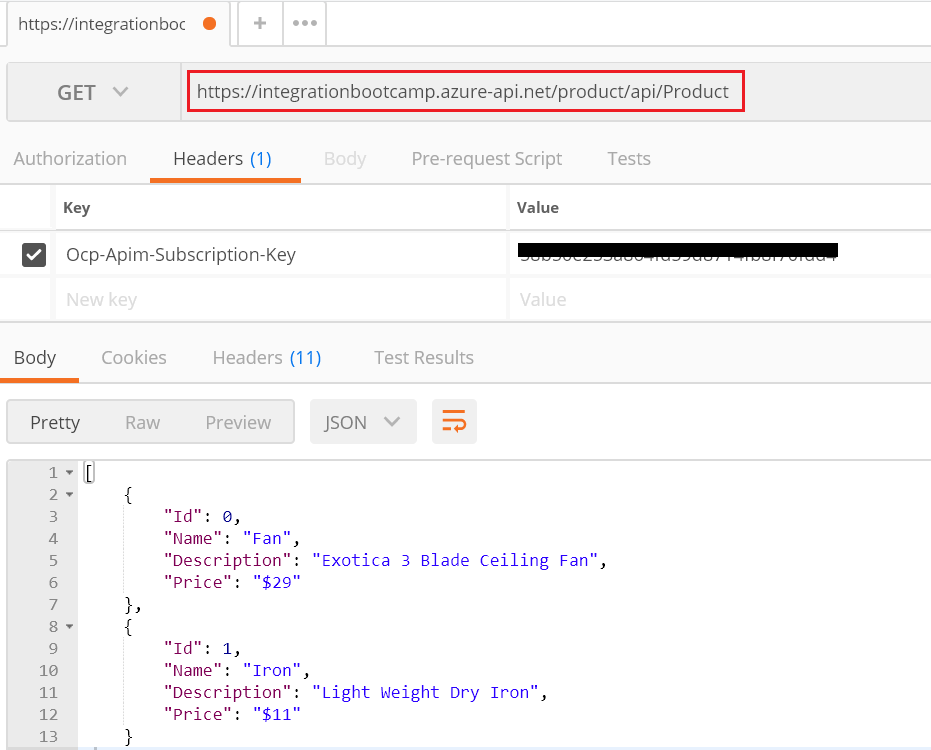
To quickly test this new API, click on Test tab à select Product_Get à click on Send button.
You should see the response as shown below. This is the response from your backend API (in this case it would be product API)
Rate Limit Policy
Now let’s add protection for your backend API by configuring rate limits.
Select Design tab and then in the Inbound processing window, click the triangle (next to the pencil) and select Code editor as shown below.
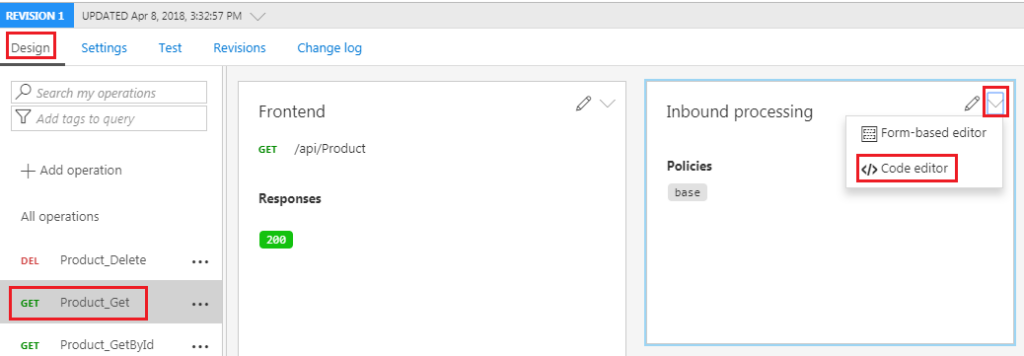
Position the cursor inside the element. In the right window, under Access restriction policies, click + Limit call rate per key.
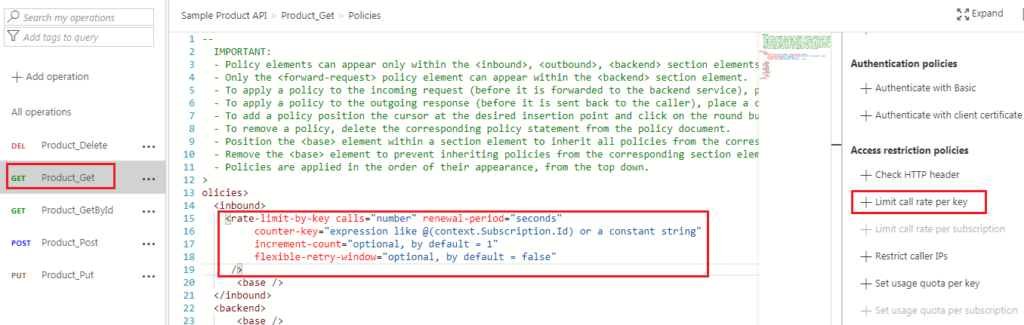
Modify your <rate-limit-by-key code (in the element) to the following code:
<rate-limit-by-key calls=”3″ renewal-period=”30″ counter-key=”@(context.Subscription.Id)” />
I need to specify the number of calls that I want to restrict to, and I need to specify a renewal period. So if you look at this policy statement, what this really means is that I’m only allowing the caller to make 3 calls within the period of 30 seconds.
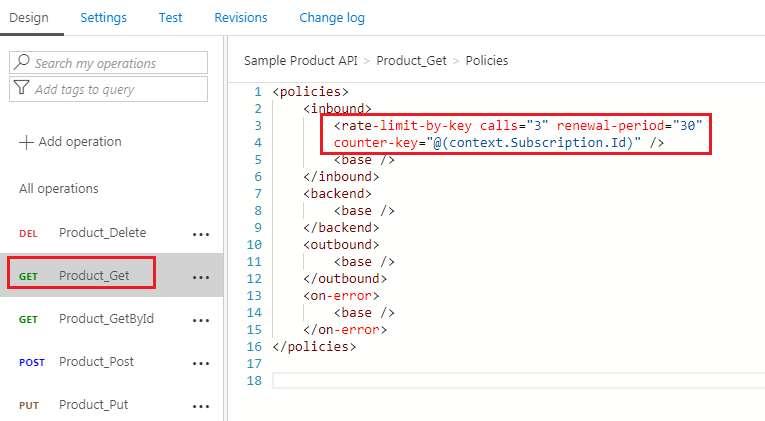
Now save the policy and you should see the rate-limit-by-key policy policy in Inbound section policy as shown below.

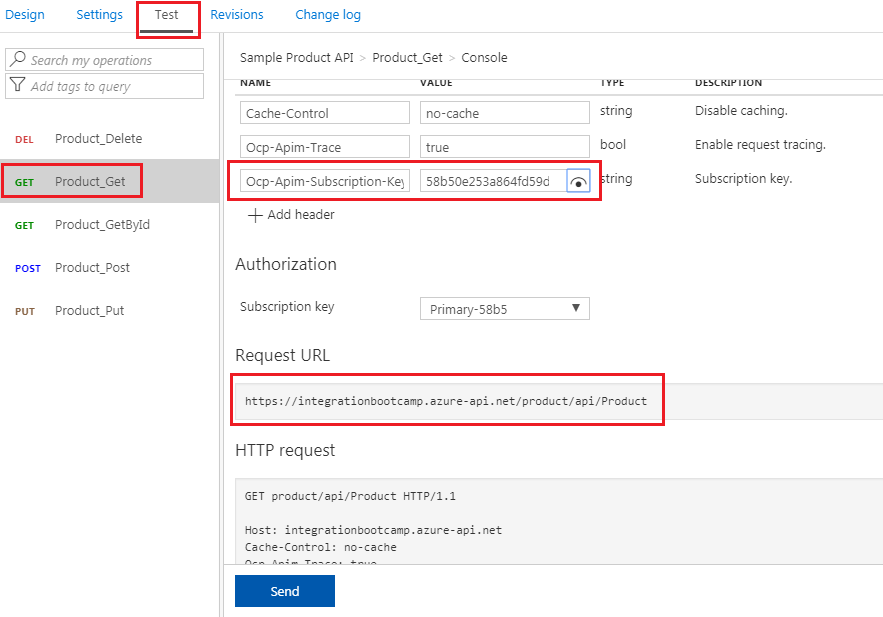
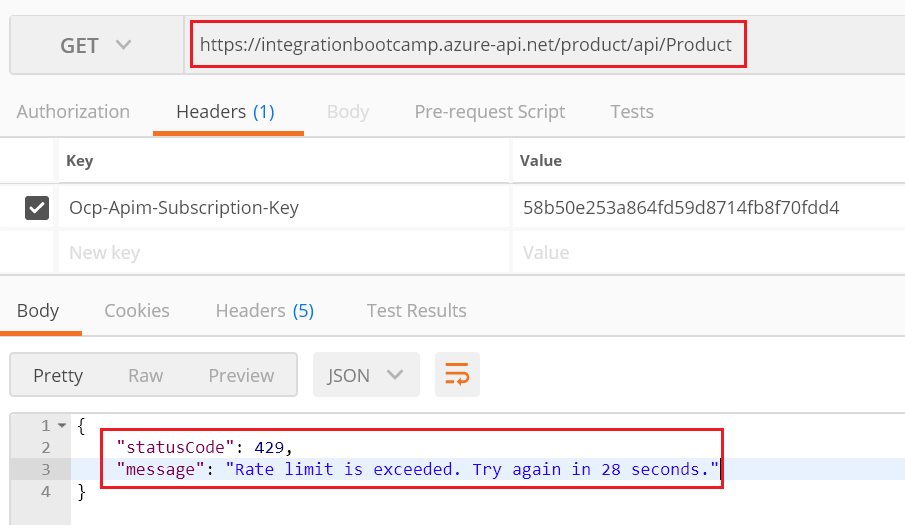
Let’s test this API with the Postman tool. You need to copy the Request URL and Ocp-Apim-Subscription-Key from the Test tab as shown below.
In postman, you should be get the successful response for the first 3 time within 30 seconds.
But as soon as you cross the limit of 3 calls within 30 seconds, you would get status code 429 with message – “Rate limit is exceeded. Try again in 28 seconds.”
So this concludes our first policy, applying a rate limit, and the code of policies exactly the same, except instead of rate limit, you’re applying a total number of calls or total number of bandwidth for a renewal period again.
JSON to XML Policy
Next policy that we want to talk about is a policy statement that returns the caller XML instead of JSON, and even if my Product API as you know has been returning a JSON, this policy statement is going to take the JSON and convert that into an XML and return it back to the caller.
Select Design tab and then in the Outbound processing window, click the triangle (next to the pencil) and select Code editor as shown below.
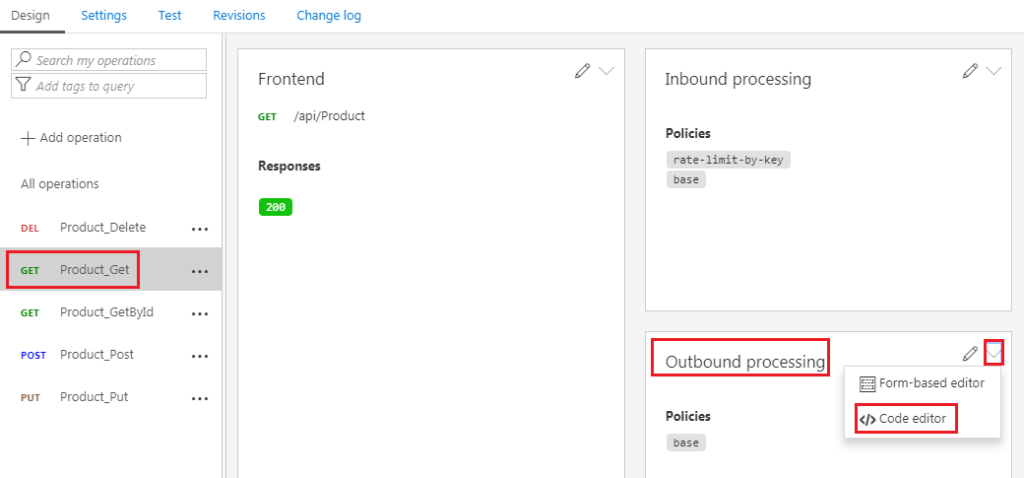
Position the cursor inside the <outbound> element. In the right window, under Transformation policies, click + Convert JSON to XML.

Modify your <json-to-xml code (in the element) to the following code:
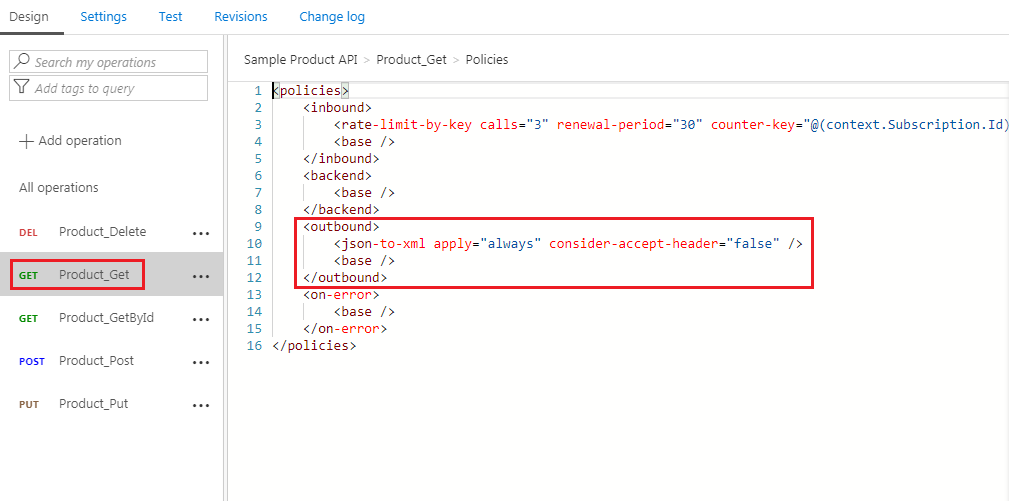
The first attribute is an apply attribute, and it can be set to always. In this case, I’m saying irrespective of the fact that the content-type is JSON or not, I want this conversion to take place. The second attribute is should I be paying attention to a request header, has the JSON conversion or the XML conversion been requested or not? In this case, I’m going to say false, so I’m not going to pay attention to the accept header, and I always want this policy statement to be applied.
Now save the policy and you should see the json-to-xml policy policy in Outbound section policy as shown below.
To test it, go back to postman tool and try now. You should see the XML response now.
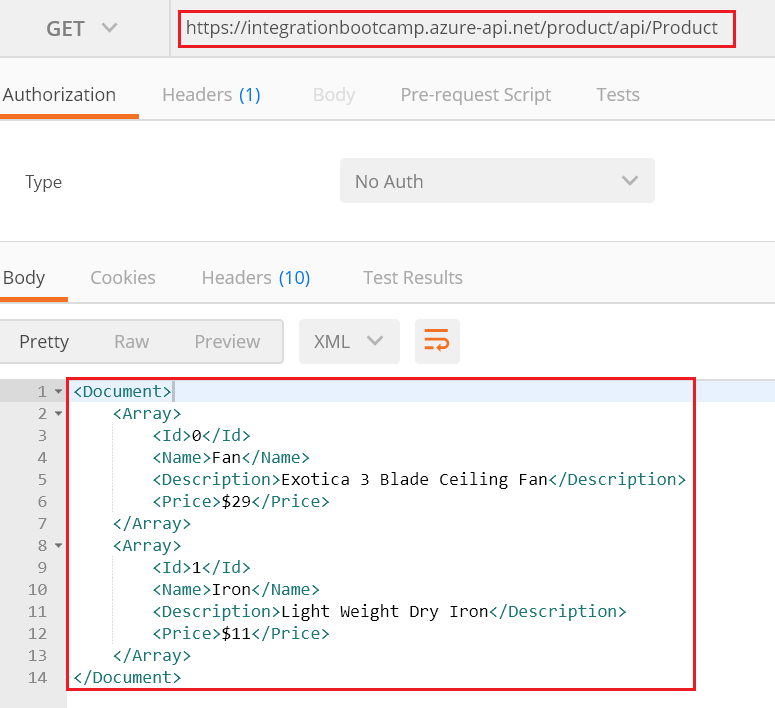
So, this concludes the demonstration for the second policy, which was JSON to XML policy.
Summary
In Azure API Management (APIM), policies are a powerful capability of the system that allow you to change the behavior of the API through configuration.
You can apply the policy inside inbound section, back-end section, outbound section and on-error section. We created two policies in a sample product API
· Rate limit policy in inbound section
· JSON to XML in outbound section